Roof flashing is one of those components most homeowners never think about until water starts dripping through a ceiling. These thin metal barriers protect the seams and transitions where your roof is most vulnerable to leaks. When flashing fails, even a solid roof can develop serious water problems. Understanding when flashing needs repair, what that work involves, and what it should cost helps you make informed decisions without unnecessary panic or expense. Here in Eastern North Carolina, where coastal wind and salt air accelerate wear, knowing the basics of roof flashing repair can save you from bigger headaches down the road.
What Roof Flashing Does and Why It Fails
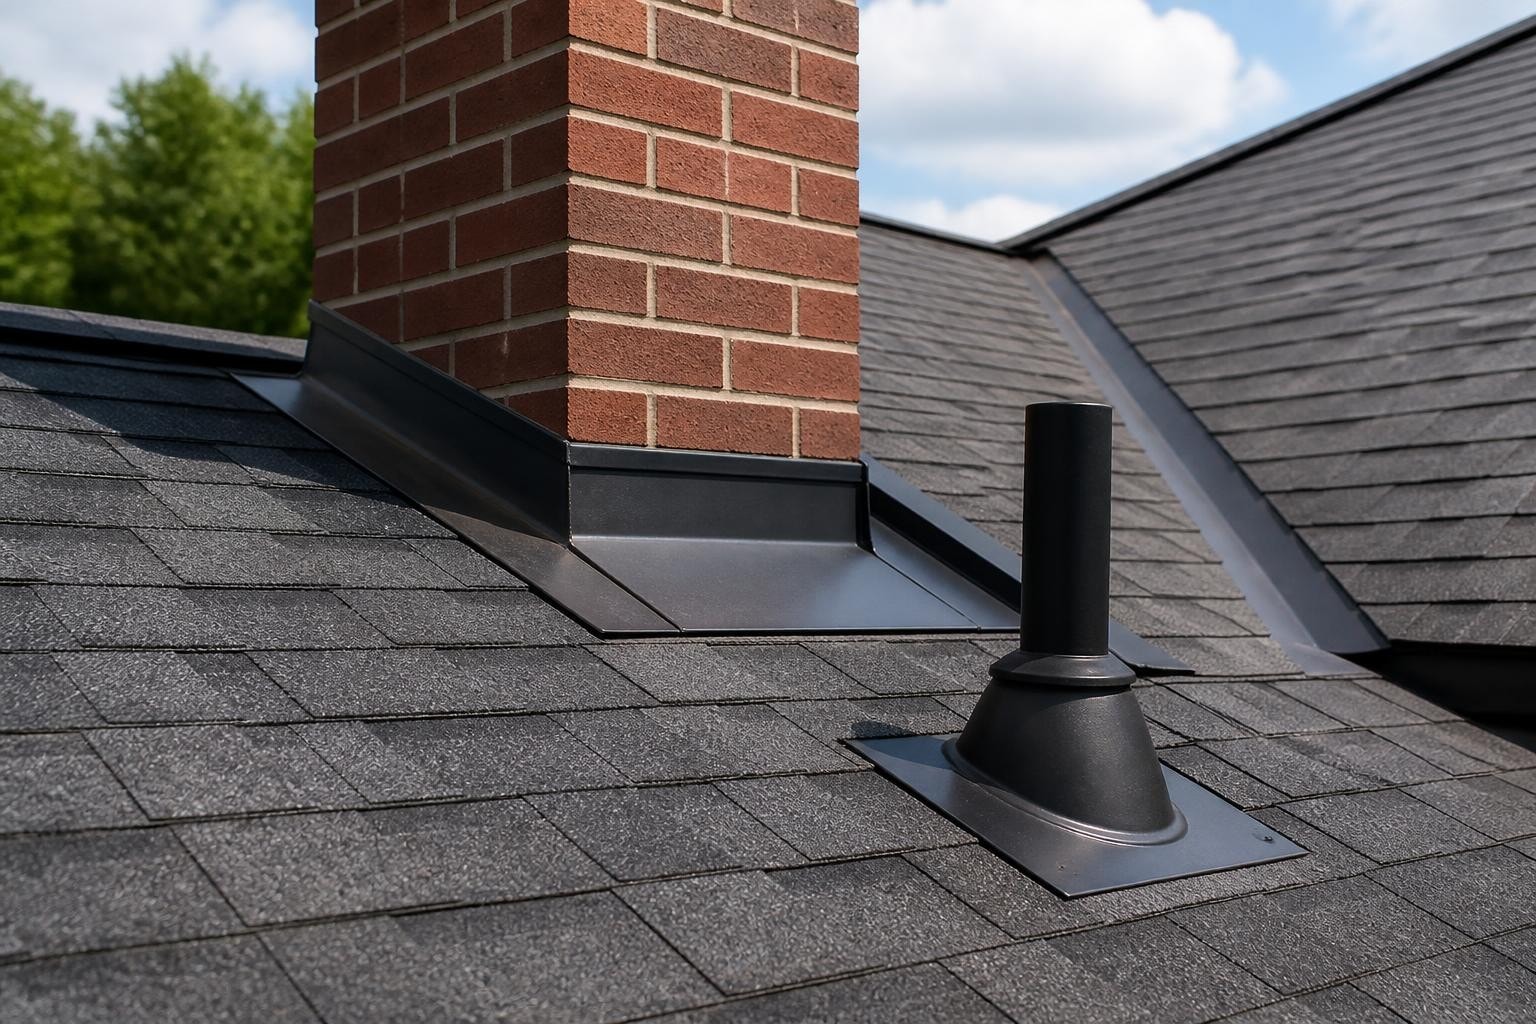
Flashing directs water away from critical junctions where two roof surfaces meet or where something penetrates the roofing material. Chimneys, vent pipes, skylights, dormers, and valleys all rely on flashing to keep water moving in the right direction.
When flashing works correctly, you never notice it. Water hits the metal, runs down and away from the opening, and continues off the roof. Proper flashing installation integrates with the shingle layers so each piece overlaps the one below it, creating a continuous barrier.
Common Flashing Failure Points
Flashing fails for predictable reasons:
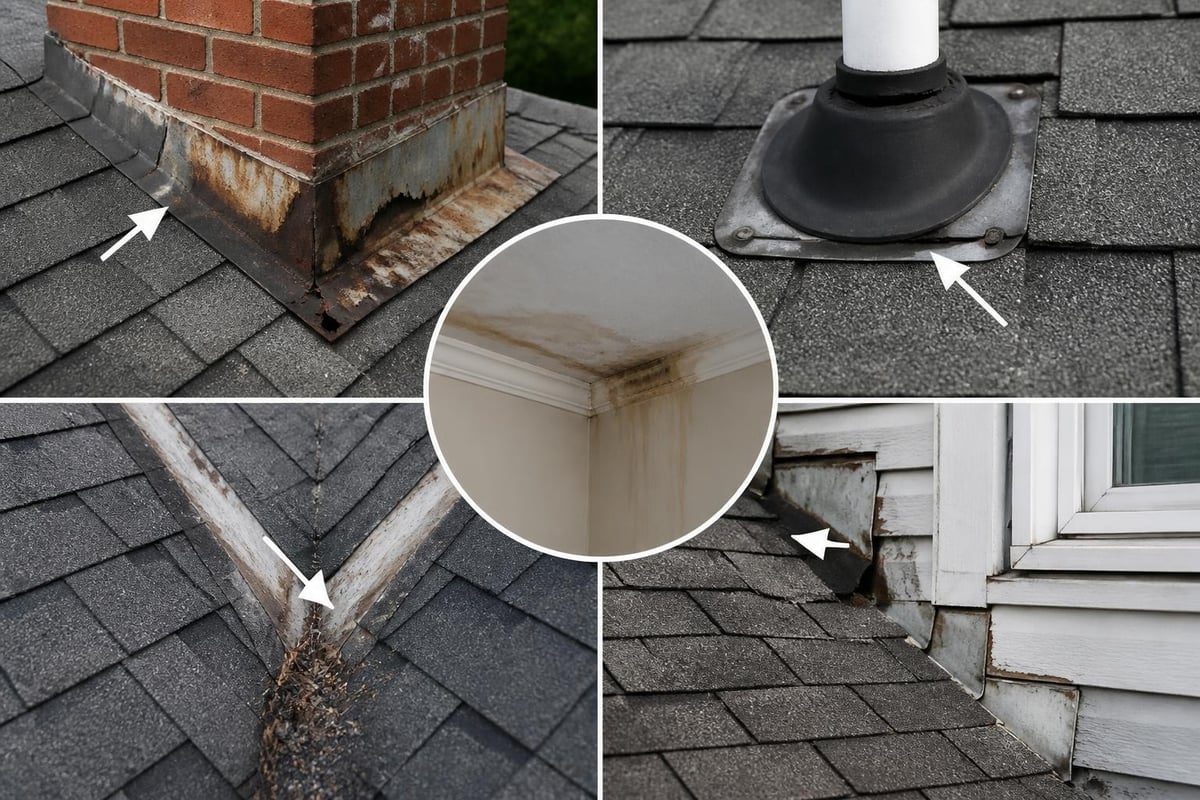
- Rust and corrosion eat through galvanized steel and aluminum, especially near the coast
- Sealant breakdown leaves gaps where caulk has dried out or separated
- Physical damage from tree limbs, hail, or foot traffic during other roof work
- Improper installation when flashing wasn't lapped correctly or integrated with shingles
- Age as metal fatigues and fasteners loosen over 15-20 years
The first sign of trouble is usually a leak during or right after rain. You might see water stains on a ceiling near a chimney, dampness around a bathroom vent, or drips in an attic corner during storms. By the time you notice interior water, the flashing has likely been compromised for weeks or months.
Types of Flashing That Commonly Need Repair
Different roof features use different flashing strategies. Knowing which type you're dealing with helps you understand the repair process and cost.
| Flashing Type | Location | Common Issues | Typical Repair |
|---|---|---|---|
| Step flashing | Sidewalls, dormers | Pulls away from wall, missing pieces | Replace sections, re-integrate with siding |
| Counterflashing | Chimneys, masonry walls | Mortar loosens, metal corrodes | Re-embed in mortar joints, replace metal |
| Valley flashing | Where two roof planes meet | Rust holes, seam separation | Full valley replacement usually needed |
| Pipe boots | Plumbing vents, gas lines | Rubber gasket cracks, base pulls up | Replace entire boot assembly |
| Drip edge | Roof perimeter | Bends, separates, rusts | Replace damaged sections |
Chimney Flashing Systems
Chimneys use the most complex flashing setup. Base flashing sits under shingles and against the chimney. Step flashing runs up the sides, with each piece tucked under a shingle course. Counterflashing embeds into the mortar joints and covers the step flashing, preventing water from getting behind it.
Chimney flashing repair often means addressing multiple components. You might need new counterflashing if the mortar has deteriorated, new step flashing if pieces are missing, or a complete redo if the original installation shortcuts the proper layering. IIBEC guidance on counterflashing explains why this overlapping system matters and what goes wrong when it's simplified or skipped.
Pipe Boot Replacements
Pipe boots are simpler but fail more predictably. The rubber or neoprene gasket around the pipe degrades in sun and weather, usually within 10-15 years. Once the gasket cracks, every rain sends water straight down the pipe and into your attic.
Replacing a pipe boot is straightforward work. The old boot comes up, shingles around it get lifted, and a new boot slides down over the pipe and under the surrounding shingles. The metal base gets sealed, shingles go back down, and the repair is complete. This is one of the most common roof flashing repair tasks and one of the least expensive.
When Flashing Can Be Repaired vs. Replaced
Not every flashing problem requires total replacement. Sometimes targeted repairs extend the life of existing flashing for years.
Good candidates for repair:
- Small rust spots that can be cleaned, primed, and sealed
- Loose counterflashing that can be re-embedded in sound mortar
- Separated sealant joints where new caulk restores the seal
- Single damaged step flashing pieces among otherwise solid runs
Situations requiring replacement:
- Widespread corrosion with multiple holes or thin spots
- Flashing that was never installed correctly in the first place
- Sections where the metal is fatigued and brittle
- Complete boot assemblies where the gasket has failed
- Valley flashing with rust-through or seam failure
The decision often comes down to how much of the flashing is compromised. If you're replacing shingles around a chimney anyway, it makes sense to do all the flashing while the area is open. If only one corner has a problem and the rest looks solid, a targeted fix saves money without cutting corners on protection.
A roof report documents exactly what condition your flashing is in, with photos and explanations of which areas need attention and which are still functioning. That clarity helps you understand whether a repair makes sense or if you're better off replacing sections now rather than dealing with repeated small failures.
The Roof Flashing Repair Process
Professional flashing repair follows a systematic approach. The work isn't complicated, but it requires careful attention to layering and integration with the existing roof.
Step-by-Step Flashing Repair Work
- Remove surrounding shingles – Shingles above and around the flashing get lifted or removed to expose the full damaged area
- Extract old flashing – Damaged pieces come out, along with old fasteners and sealant
- Inspect underlayment – Check that the felt or synthetic underlayment isn't damaged; replace if needed
- Install new flashing – New pieces go in following NRCA installation standards, with proper overlap and fastening
- Integrate with shingles – Shingles layer back over and around the flashing, maintaining the water-shedding sequence
- Seal critical joints – High-quality sealant at joints and edges, not as a primary waterproofing layer but as backup
The key is maintaining the correct overlap pattern. Each piece of flashing should direct water onto the piece below it, and shingles should always overlap flashing edges so water can't work its way up and under.
Material Selection for Coastal Environments
Here in coastal North Carolina, material choice matters more than it does inland. Salt air accelerates corrosion on standard galvanized steel.
Better options for lasting repairs include:
- Aluminum flashing – won't rust, lightweight, cost-effective
- Copper – extremely durable, develops protective patina, premium cost
- Stainless steel – excellent corrosion resistance, moderate price
- Pre-painted galvalume – coated steel with better coastal performance than basic galvanized
Avoid bare galvanized steel near the ocean. It might last five years before rust appears. Spending a bit more on corrosion-resistant materials means the repair actually lasts instead of becoming a recurring problem.
Costs and Timeline for Flashing Repairs
Roof flashing repair costs vary based on what's being fixed, how accessible it is, and how much surrounding work is required.
Typical Eastern NC pricing ranges:
- Single pipe boot replacement: $150-$300 per boot
- Step flashing repair (one wall section): $400-$800
- Complete chimney reflashing: $800-$1,800
- Valley flashing replacement: $600-$1,200 per valley
- Drip edge section replacement: $200-$500
These are repair-only numbers. If you're also replacing shingles, the flashing work integrates with that project and costs adjust accordingly. Professional roof repair services often bundle flashing fixes with related shingle work since you're already opening up those areas.
Factors That Increase Repair Costs
Certain situations add complexity and expense:
- Steep pitch roofs require more safety equipment and slower work
- Multi-story homes need staging or scaffolding for safe access
- Custom flashing fabrication when standard sizes don't fit unusual penetrations
- Hidden damage discovered once flashing is removed and underlayment is exposed
- Matching specialty materials on historic or high-end homes
Timeline for flashing repairs is usually quick once the work starts. A simple pipe boot replacement takes an hour or two. A complete chimney reflashing might take a full day. Weather delays are the main variable – flashing work requires dry conditions and can't happen during rain or high wind.
Identifying Flashing Problems Before They Cause Damage
Catching flashing issues early means smaller repairs and less interior damage. A few simple checks help you spot problems before they become serious.
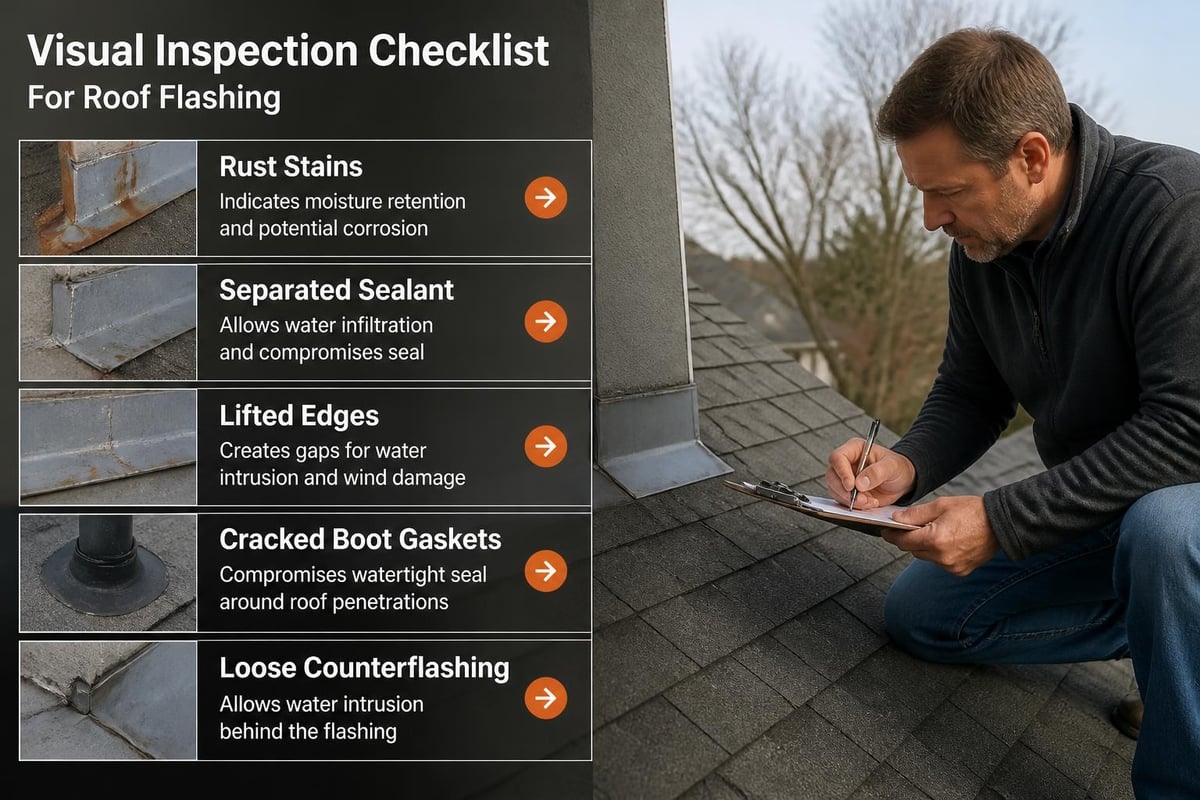
Exterior signs of flashing trouble:
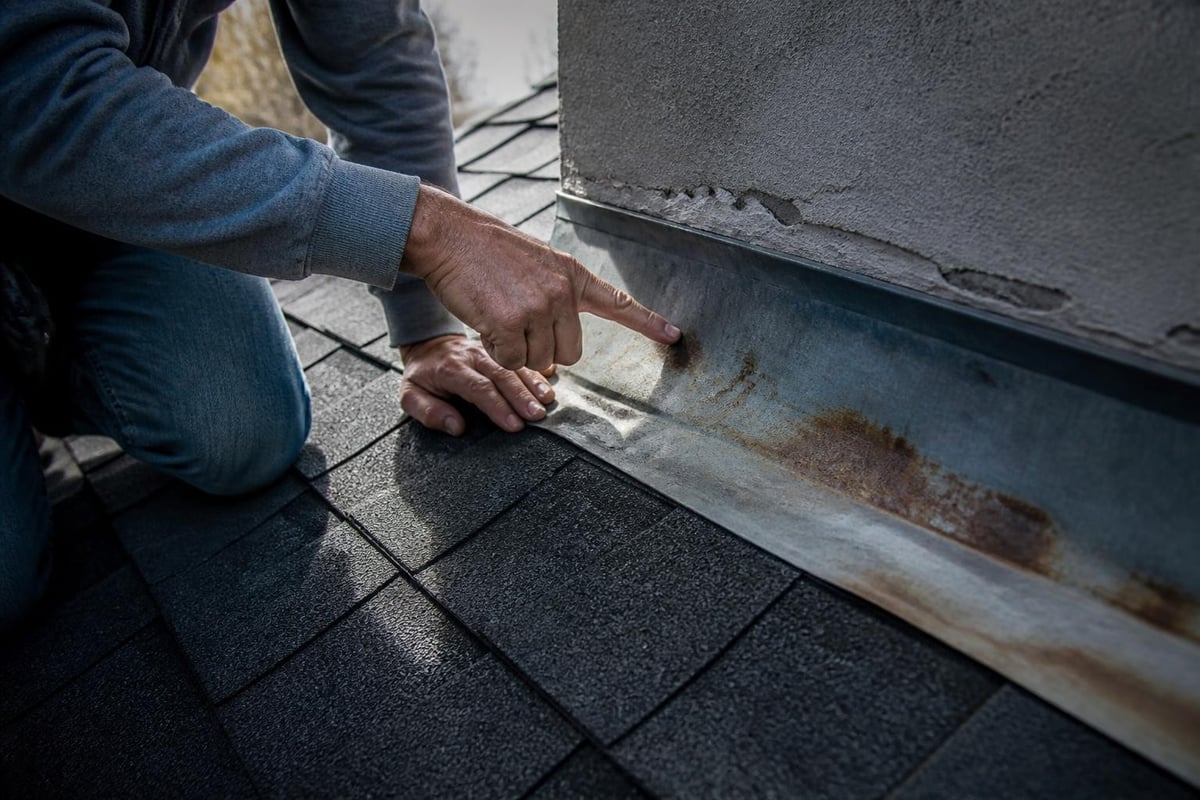
- Rust stains running down from chimney or wall joints
- Gaps visible between flashing and the roof or wall surface
- Lifted or bent flashing edges
- Cracked or separated caulk lines
- Missing or loose pieces of step flashing
Interior warning signs:
- Water stains on ceilings near chimneys, vents, or walls
- Dampness in attic corners after rain
- Musty smell concentrated in specific areas
- Visible drips during or right after storms
Regular roof inspections catch these problems at the repair stage instead of the emergency stage. An annual check, especially after major storms, gives you time to plan repairs during good weather rather than scrambling to stop active leaks during the next rain event. Building America guidance on roof penetration flashing outlines what proper installations should look like, which helps you recognize when something is wrong.
DIY vs. Professional Flashing Repair
Some homeowners consider tackling roof flashing repair themselves. Understanding what's involved helps you make a realistic decision about when to hire help.
When DIY Makes Sense
Limited situations work for homeowner repairs:
- Single-story home with safe, easy roof access
- Simple pipe boot replacement on low-pitch roof
- You're comfortable working at height with proper safety equipment
- You understand the shingle layering sequence and flashing integration
- The repair is small and isolated
Even then, the work requires specific tools (tin snips, roofing hammer, sealant gun) and materials that need to integrate correctly with your existing roof. One mistake in the overlap sequence can create a new leak path.
Why Most Flashing Repairs Benefit from Professional Work
Professional repairs offer advantages beyond just getting the job done:
- Safety equipment and experience working on pitched roofs
- Proper diagnosis of what's actually failing versus what looks damaged
- Material knowledge for coastal conditions and compatibility
- Tool access for metal fabrication and custom flashing
- Integration with the existing roof system following manufacturer specs
- Warranty on both materials and workmanship
The NRCA repair guidelines contractors follow ensure repairs meet industry standards. That matters for insurance claims, future roof work, and simply knowing the repair will actually stop the leak.
Insurance Coverage for Flashing Repairs
Whether insurance covers roof flashing repair depends on what caused the damage and your policy specifics.
Generally covered scenarios:
- Wind damage from named storms that lifted or tore flashing
- Hail impact that dented or punctured metal
- Fallen tree limbs that damaged flashing and surrounding roof
- Sudden, accidental damage from external events
Generally not covered:
- Normal wear and deterioration over time
- Rust from age and weather exposure
- Installation defects from original construction
- Damage from deferred maintenance
The challenge is documentation. Insurance adjusters need clear evidence that specific storm damage caused the flashing failure, not just gradual deterioration. Photos showing when damage occurred, documentation of the storm event, and professional assessment of the cause all strengthen a claim.
This is where having a detailed roof inspection with photos before storm season helps. You can show what condition the roof was in before the storm, making it easier to document what actually happened during the event versus what was pre-existing.
Maintaining Flashing After Repair
Once flashing is repaired, simple maintenance extends its life and catches small problems before they grow.
Annual maintenance steps:
- Clear debris from valleys and around chimneys after fall leaves
- Check sealant joints for cracks or separation each spring
- Look for rust spots and address them with primer and coating
- Verify step flashing hasn't pulled away from walls
- Inspect pipe boots for gasket cracking
These checks take 20-30 minutes if you're comfortable on a ladder. If not, an annual professional inspection covers the same ground. The investment is minimal compared to interior water damage from a failed flashing joint.
Coastal-Specific Maintenance Considerations
Eastern North Carolina's salt air and coastal weather create extra flashing stress:
- Rinse flashing during annual roof cleaning to remove salt buildup
- Check fasteners more frequently as salt accelerates corrosion
- Apply protective coatings to aluminum or steel flashing every few years
- Monitor after named storms since wind can lift edges and loosen pieces
Areas within a few miles of the ocean need more frequent attention than inland locations. The combination of salt, moisture, and wind works harder on all roof components, flashing included.
Long-Term Flashing Strategies and Replacements
Eventually, roof flashing reaches the end of its useful life. Planning for that timeline helps you budget and avoid emergency situations.
Most flashing materials last:
- Galvanized steel: 15-20 years, less near coast
- Aluminum: 20-30 years with proper installation
- Copper: 50+ years, often outlasts the roof itself
- Rubber pipe boots: 10-15 years in direct sun
When you replace your roof, that's the ideal time to address all flashing. The roof is already open, shingles are off, and the incremental cost of new flashing is much lower than doing it as a separate project later.
If your roof is 10-15 years old and flashing is starting to show problems, it often makes more sense to plan for replacement in the next few years rather than investing heavily in repairs. That's a conversation worth having with a straight-talking contractor who explains your actual options instead of pushing for the most expensive one.
| Flashing Material | Coastal Lifespan | Cost Factor | Best Use Case |
|---|---|---|---|
| Galvanized steel | 10-15 years | Lowest | Temporary fixes, budget constraints |
| Aluminum | 20-25 years | Moderate | Standard installations, good value |
| Copper | 50+ years | Highest | Premium homes, long-term investment |
| Stainless steel | 30-40 years | High | Coastal durability without copper cost |
Understanding roof flashing repair helps you protect your home without overspending on work that isn't needed yet. Small problems caught early stay small, while ignored flashing failures turn into interior damage, mold, and structural issues. If you're seeing signs of flashing trouble or just want to know what condition your roof is actually in, NC Roofs provides clear documentation and honest recommendations for homeowners across Hampstead, Topsail, Surf City, and the surrounding coastal area. We'll show you what's happening with your roof and explain your options so you can make an informed decision.