
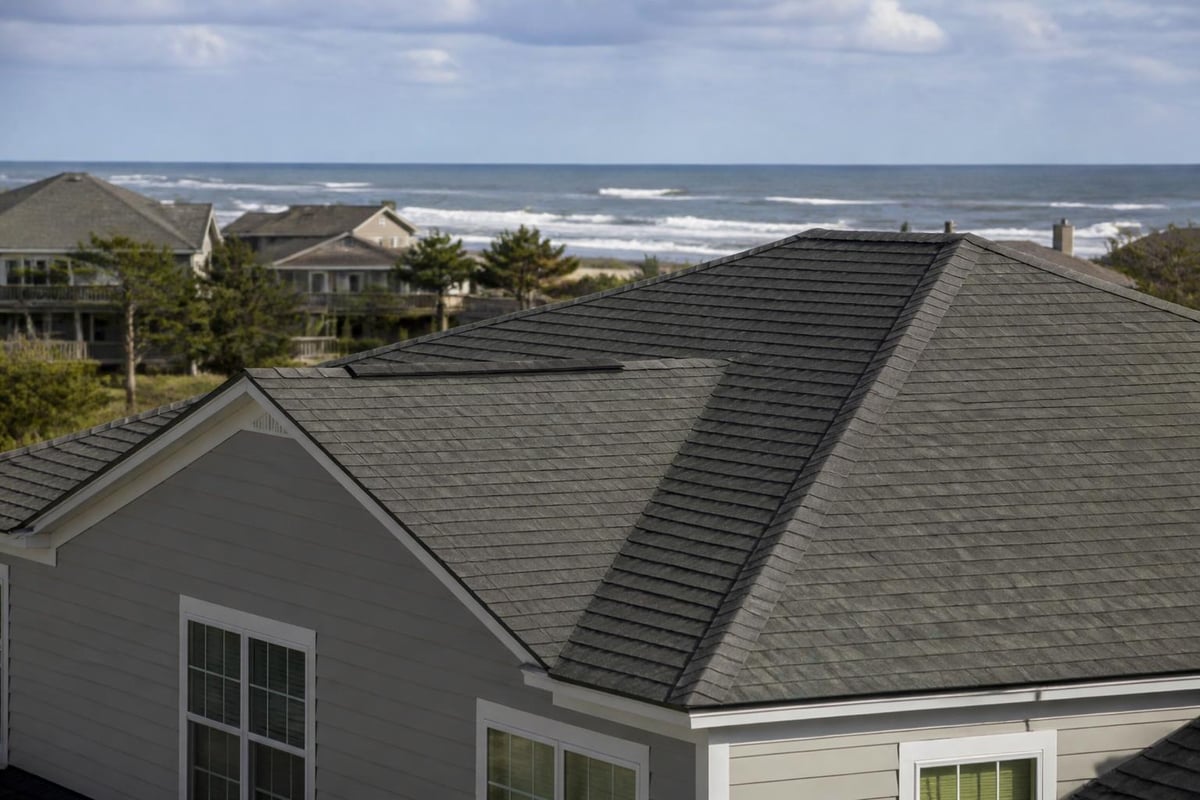
Wind storms hit the Hampstead area with surprising force, even when they don't make headlines. Coastal North Carolina sits right in the path of nor'easters, tropical systems, and seasonal squalls that bring sustained winds and sudden gusts. These events leave behind roof damage that ranges from obvious problems like missing shingles to hidden issues that won't show up until the next heavy rain. Understanding what happens to your roof during high winds and knowing what to look for afterward helps you protect your home and make informed decisions about repairs.
How Wind Damages Roofs in Coastal Areas
Wind doesn't just blow over your roof. It creates pressure differences that lift, peel, and tear roofing materials from their attachments. When wind hits the edge of your roof or a corner, it speeds up and creates suction on the underside of shingles. This lifting force works against the adhesive strips and nails holding everything down.
The sequence typically unfolds like this:
- Wind catches the edge or corner of a shingle
- Suction lifts the shingle tab away from the roof deck
- The shingle either tears, creases, or pulls free completely
- Once one shingle is compromised, adjacent shingles become vulnerable
- Water can penetrate through exposed nail holes or gaps
Hampstead's location means roofs face both gradual wear from salt air and sudden stress from storm systems. A roof that looks fine on a calm day might have weakened adhesive or corroded fasteners that fail when winds reach 45-60 mph.
Common Wind Damage Patterns
Different roof areas show distinct damage patterns based on wind direction and roof geometry. Edges, ridges, and corners take the most stress because wind accelerates around these features.
| Roof Area | Typical Damage | Why It Happens |
|---|---|---|
| Corners | Missing shingles, lifted tabs | Wind speed increases at corners, creating maximum uplift |
| Ridge caps | Cracked or displaced caps | Exposed position catches wind from multiple directions |
| Valleys | Torn flashing, separated seams | Concentrated water flow combines with wind pressure |
| Eaves | Lifted drip edge, exposed fascia | First point of wind contact, often poorest seal |
Roof damage after wind storm Hampstead NC often shows these exact patterns because coastal winds tend to come from consistent directions during weather events. Northeast winds from nor'easters and southeast winds from tropical systems each create predictable stress points.
Inspecting Your Roof After a Wind Event
You don't need to climb on your roof to spot most wind damage. Ground-level inspection catches the majority of problems, and it's safer than walking on potentially compromised shingles.
Start with these observation points:
- Walk your property perimeter looking up at all roof slopes
- Check for shingles in gutters, yard, or caught in landscaping
- Look for uneven lines along roof edges where shingles might be lifted
- Note any visible gaps, missing pieces, or color changes (exposed underlayment)
- Examine valleys and flashing around chimneys for separation
Use binoculars to inspect areas you can't see clearly from the ground. Morning or late afternoon light creates shadows that make lifted shingles easier to spot. Take photos of anything that looks different from before the storm.
Interior Signs of Roof Compromise
Wind damage doesn't always show from outside first. Sometimes water intrusion reveals problems before external damage becomes obvious.
Check your attic if you can safely access it. Look for:
- New daylight visible through the roof deck
- Wet insulation or water stains on rafters
- Drip marks on the underside of roof sheathing
- Displaced or damaged radiant barrier
Inside your living spaces, ceiling stains, bubbling paint, or damp spots near exterior walls all point to roof penetration. These signs matter even if you can't see external damage, because wind can create openings without removing shingles entirely.
According to research on post-hurricane building damage assessment, comprehensive evaluation requires both external and internal inspection to identify all compromised areas. This multi-perspective approach catches damage that single-viewpoint inspection misses.
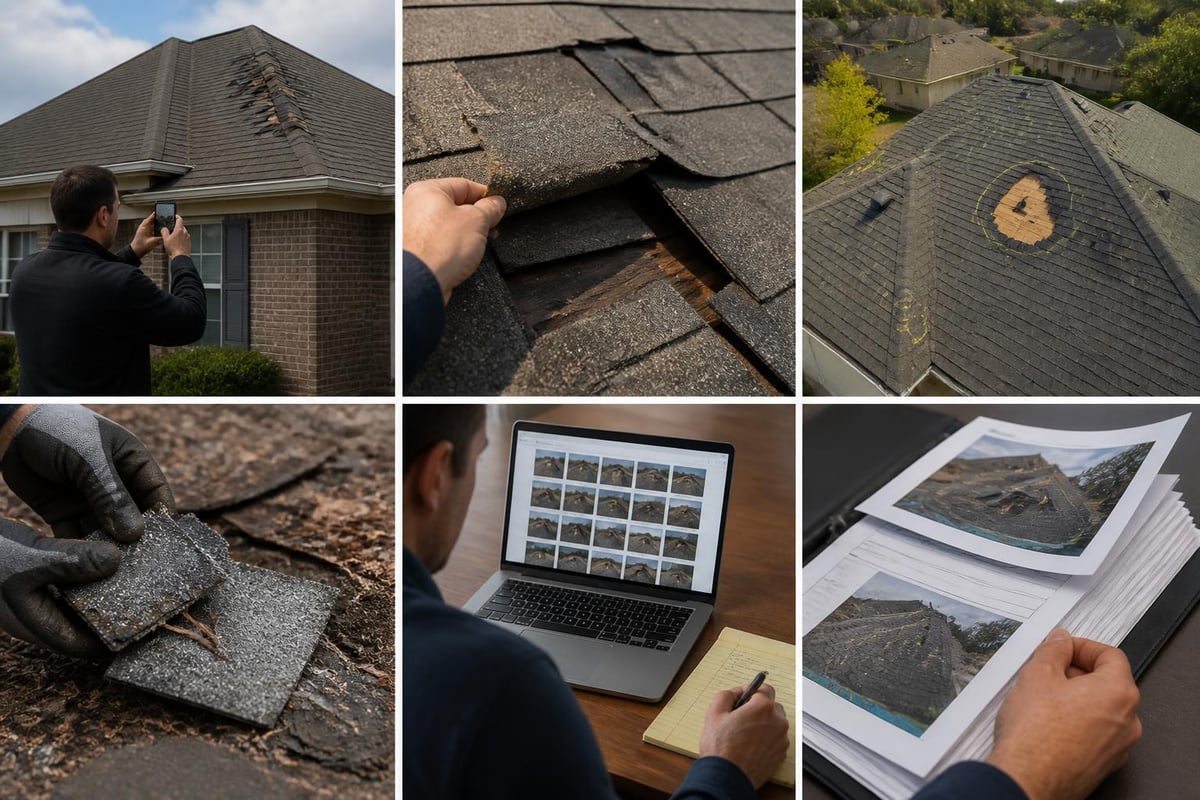
Documenting Damage for Insurance and Repairs
Good documentation makes the difference between a smooth insurance claim and a contested one. The goal is creating a clear record of what the storm damaged, separate from pre-existing wear.
Take photos from multiple angles showing:
- Overall roof views from each side of the house
- Close-ups of specific damaged areas
- Context shots showing damage location relative to roof features
- Ground debris like fallen shingles or metal flashing
- Date-stamped images if your camera or phone supports it
Write down what you observe in simple terms. "Six shingles missing from northwest corner" works better than vague descriptions. Note the date and approximate time you discovered each problem.
Creating a Damage Report
A structured damage report helps contractors give accurate estimates and helps insurance adjusters understand the scope. Owens Corning’s roof storm damage checklist provides a framework for organizing your findings.
Your report should include:
- Date and type of weather event (wind storm, nor'easter, tropical system)
- Discovered damage date (may differ from storm date)
- Affected roof sections (north slope, ridge, etc.)
- Damage type (missing, lifted, cracked, torn)
- Interior effects (leaks, stains, visible penetration)
- Debris collected (keep samples of damaged materials)
This documentation supports both insurance claims and helps contractors understand what happened without having to interpret damage themselves. NC Roofs uses homeowner documentation as a starting point for detailed roof reports that identify what actually needs attention.
Understanding Repair vs. Replacement Decisions
Not all roof damage after wind storm Hampstead NC requires full replacement. The decision depends on damage extent, roof age, and whether repairs will restore weather protection without creating a patchwork that fails prematurely.
Repair makes sense when:
- Damage is localized to specific sections
- The roof is less than 12-15 years old
- Surrounding shingles are in good condition
- Matching materials are available
- The repair won't void remaining warranty coverage
Replacement becomes the better choice when:
- Damage affects more than 30% of the roof surface
- The roof is near the end of its expected lifespan
- Multiple layers of old shingles complicate repairs
- Previous repairs have created inconsistent protection
- Insurance covers replacement but limits repair reimbursement
Age matters more than many homeowners realize. A 20-year-old roof with wind damage might cost less to replace than repeatedly repairing, especially when you factor in the remaining useful life of undamaged sections.
Cost Considerations for Wind Damage Repairs
Repair costs vary based on accessibility, material matching, and how much surrounding material needs replacement to create a weather-tight seal.
| Repair Type | Typical Scope | Cost Range Factors |
|---|---|---|
| Shingle replacement | 10-50 shingles | Access difficulty, shingle availability, warranty requirements |
| Ridge cap repair | Full ridge length | Linear feet, ventilation integration, color matching |
| Flashing replacement | Chimney, valley, or wall | Metal type, sealing requirements, surrounding shingle removal |
| Emergency tarping | Storm protection | Coverage area, roof pitch, duration needed |
Roof repair focuses on fixing what actually needs attention rather than pushing for unnecessary work. Getting a clear assessment before deciding on repair or replacement lets you compare real options instead of guessing.
The National Storm Authority’s guidance on roof damage restoration emphasizes proper assessment before committing to either approach, as premature decisions often lead to inadequate solutions.
Working With Contractors After Storm Damage
Storm events bring out both reputable contractors and opportunistic operators. Knowing the difference protects your home and your budget.
Red flags to watch for:
- Unsolicited door-knocking immediately after storms
- Pressure to sign contracts before inspection
- Offers to "eat" your insurance deductible
- No local address or established business presence
- Requests for full payment upfront
Legitimate contractors provide written estimates, carry proper insurance, and explain what they found rather than just quoting a price. They should walk you through damage and discuss whether repair or replacement makes more sense for your specific situation.
Getting Useful Estimates
A helpful estimate does more than list a total price. It breaks down what work is needed and why, so you understand what you're paying for.
Ask contractors to specify:
- Exact materials being used (manufacturer, product line, color)
- Square footage or linear footage being addressed
- Which damaged areas will be repaired
- Whether repairs include only damaged sections or extend to logical break points
- Warranty terms for both materials and workmanship
- Timeline from start to completion
Compare estimates on scope, not just price. The lowest bid often excludes work that other contractors include, making true cost comparison difficult without understanding what each estimate covers.
Research on roof vulnerabilities in coastal areas shows that proper material selection and installation methods significantly impact wind resistance. Contractors familiar with Hampstead's specific conditions should recommend appropriate materials for coastal exposure.
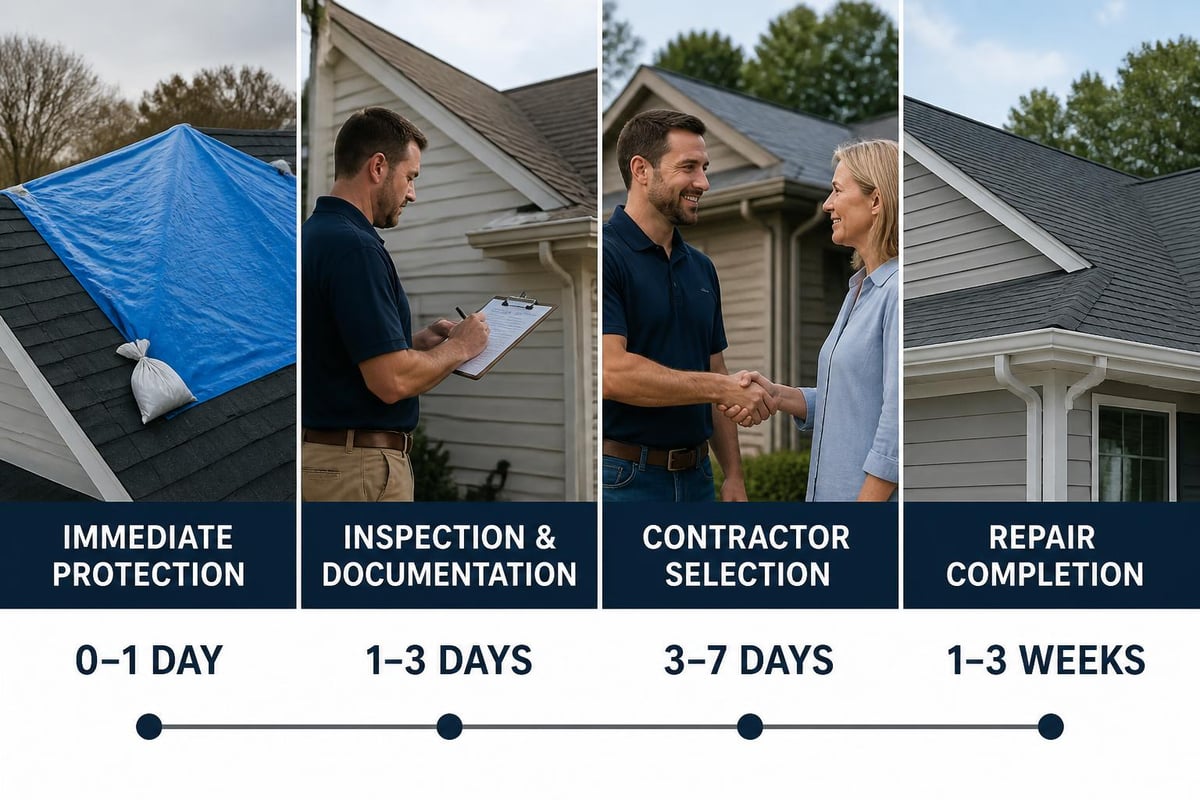
Timeline for Addressing Wind Damage
Speed matters after discovering roof damage, but panic doesn't help. Understanding what's urgent and what can wait lets you make good decisions without rushing into poor ones.
Immediate priorities (within 24-48 hours):
- Stop active leaks with tarps or temporary patches
- Move belongings away from leak areas
- Document damage while conditions are fresh
- Contact insurance company to report the claim
- Get emergency protection if needed
Short-term actions (within one week):
- Schedule contractor inspections
- Collect detailed estimates
- Review insurance adjuster findings
- Plan repair approach based on damage extent
Medium-term follow-through (within 2-4 weeks):
- Select contractor and schedule work
- Finalize material selections
- Coordinate insurance approval
- Complete permanent repairs
Roof damage after wind storm Hampstead NC tends to worsen if left unaddressed because coastal weather keeps testing vulnerable spots. A lifted shingle that survived one storm might not make it through the next rain event.
Material Quality and Wind Resistance
Not all shingles handle wind the same way. Coastal installations need materials rated for high-wind conditions, and proper installation matters as much as material quality.
Standard architectural shingles typically carry wind ratings of 110-130 mph when properly installed. High-wind shingles designed for coastal areas often rate to 130-150 mph. The difference comes from:
- Enhanced adhesive strips that create stronger bonds
- Heavier base materials that resist lifting
- Reinforced nail zones that prevent tear-through
- Extended warranties for wind damage in coastal regions
Installation technique affects these ratings significantly. Shingles installed in cold weather without proper sealing, or those with insufficient nailing, won't achieve their rated wind resistance even if the materials are top quality.
Understanding Impact-Rated and High-Wind Products
Coastal building codes sometimes require impact-rated or high-wind-certified materials. These products undergo testing that simulates both wind uplift and flying debris impact.
Features that improve wind performance include:
- Six nails per shingle instead of four
- Specialized starter strips at eaves and rakes
- Enhanced hip and ridge products with larger nailing flanges
- Modified installation patterns for high-wind zones
Your contractor should know whether Hampstead's location requires specific wind-rated products or installation methods. Insurance companies often offer premium discounts for certified high-wind installations, offsetting some of the additional material cost.
Studies of turbulent flow over structures in hurricane conditions demonstrate how wind interacts with roof geometry, explaining why proper material selection and installation create measurable differences in storm performance.
Insurance Claims for Wind Damage
Most homeowner policies cover wind damage, but coverage details vary widely. Understanding what your policy actually says before you file a claim prevents surprises during the adjustment process.
Key policy terms to review:
- Wind/hail deductible: Often higher than standard deductible, sometimes a percentage of dwelling coverage
- Actual cash value vs. replacement cost: Determines whether you get depreciated value or full replacement
- Matching provisions: Whether insurance pays to replace only damaged sections or entire roof planes for appearance
- Code upgrade coverage: Pays for improvements required by current building codes
- Temporary protection: Coverage for tarps or emergency repairs before permanent fix
File your claim promptly, but don't rush into repairs before the adjuster inspects unless emergency protection is necessary. Most policies allow immediate action to prevent further damage, with reimbursement for reasonable protective measures.
Working With Insurance Adjusters
Adjusters assess damage to determine covered losses. Their findings drive what your insurance pays, so understanding the process helps you ensure nothing gets missed.
Be present during the adjuster's inspection if possible. Point out all damage you've documented and ask questions about anything you don't understand in their assessment. If the adjuster's findings seem incomplete, you can request a re-inspection or hire a public adjuster to represent your interests.
Keep records of all communication with your insurance company, including:
- Claim number and filing date
- Adjuster contact information
- Initial assessment findings
- Any supplemental damage discovered during repairs
- Approval letters and payment documentation
Some homeowners find that contractor estimates reveal damage the adjuster missed. Most policies allow for supplemental claims when additional covered damage becomes apparent during repair work.
Preventing Future Wind Damage
While you can't storm-proof a roof completely, certain improvements reduce vulnerability to future wind events. These upgrades make sense during repair or replacement, when the roof is already being worked on.
Effective wind-resistance improvements:
- Upgrade to high-wind-rated shingles with extended warranties
- Add extra fasteners in high-stress areas like corners and edges
- Install enhanced starter strips at all roof perimeters
- Replace corroded or undersized flashing with heavier-gauge materials
- Seal around all roof penetrations with flexible, weather-resistant products
- Ensure proper attic ventilation to reduce pressure differences
Regular maintenance also matters. Annual inspections catch minor issues before they become entry points for wind. Loose shingles, separated flashing, and deteriorated sealant all create weak points that wind exploits during storms.
Maintenance Between Storms
Roof damage after wind storm Hampstead NC often starts with small problems that existed before the storm. Preventive maintenance keeps those small issues from becoming major damage when high winds arrive.
Schedule inspections:
- Annually for roofs over 10 years old
- After any significant weather event (even if no obvious damage)
- Before hurricane season (May-November) each year
- When you notice anything unusual (stains, granules in gutters, visible damage)
Clean gutters regularly so water flows away from roof edges properly. Trim tree branches that could fall on the roof during storms. Check that ridge vents, soffit vents, and gable vents remain clear and properly attached.
These basic steps don't prevent all wind damage, but they reduce the likelihood of damage spreading beyond the initial impact zone. A well-maintained roof handles wind stress better than one with multiple pre-existing weak points.
What Happens If You Wait to Repair
Delaying repairs after discovering roof damage creates cascading problems. Water penetration damages roof decking, insulation, and structural framing. Mold grows in damp conditions. Small openings enlarge as weather continues to stress weakened areas.
Insurance companies may deny claims for damage that worsens due to lack of timely repair. Policies typically require homeowners to mitigate losses by addressing damage promptly. Waiting months to repair a known leak could void coverage for subsequent interior damage.
Progression of unrepaired wind damage:
- Week 1: Initial wind damage creates openings
- Weeks 2-4: Rain enters through openings, wetting underlayment and decking
- Months 2-3: Decking begins to deteriorate, insulation becomes saturated
- Months 4-6: Interior damage appears as stains, mold growth starts
- Beyond 6 months: Structural damage may require extensive repairs beyond roofing
The cost of addressing advanced damage typically exceeds the cost of prompt repair by a significant margin. A $2,000 shingle replacement can become a $10,000 project once decking, insulation, and interior repairs enter the scope.
Wind damage happens quickly, but the decisions you make afterward determine whether you end up with a properly protected home or ongoing problems. Understanding what to look for, how to document it, and when repair makes more sense than replacement gives you control over the process. If you're dealing with roof damage after wind storm Hampstead NC, NC Roofs provides clear roof reports that explain what's actually going on and what your real options are, without pressure to do more than what your home needs.


