When storm damage strikes your home, tarping a roof becomes an urgent priority to prevent further water intrusion and protect your belongings. A properly installed tarp acts as a temporary barrier against rain, wind, and debris until permanent repairs can be scheduled. While this emergency measure seems straightforward, understanding the right approach makes the difference between effective protection and potential safety hazards or additional damage.
Understanding When You Need a Roof Tarp
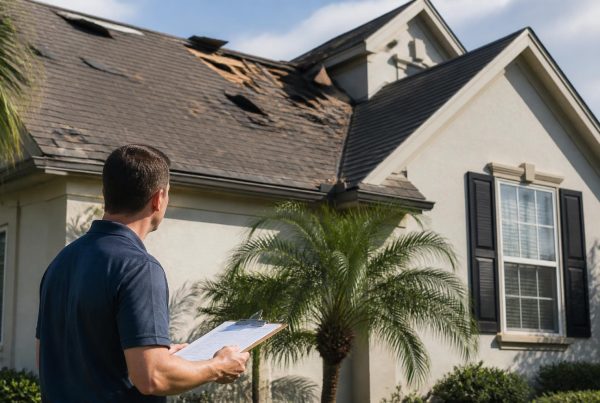
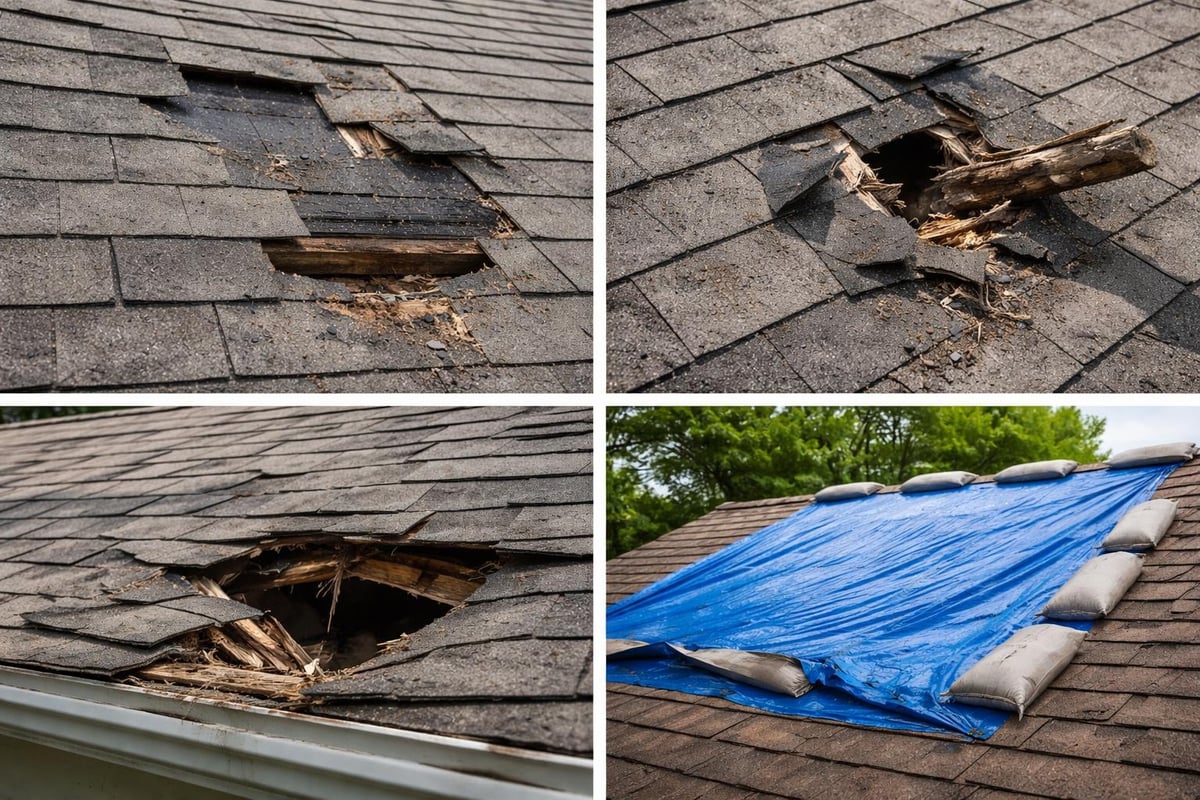
Storm damage doesn't always announce itself with obvious holes or missing sections. Sometimes water stains on your ceiling or a small leak signal the need for immediate action.
Common situations requiring emergency tarping include:
- Missing or severely damaged shingles after high winds
- Fallen tree branches that puncture the roof deck
- Hail damage that compromises the waterproof barrier
- Tornado or hurricane damage affecting large roof sections
- Fire damage exposing the roof structure to weather
The timing matters significantly. Water damage compounds quickly once your home's envelope is breached. What starts as a small leak can lead to ceiling collapse, mold growth, and ruined insulation within days if left unaddressed.
Safety Considerations Before You Start
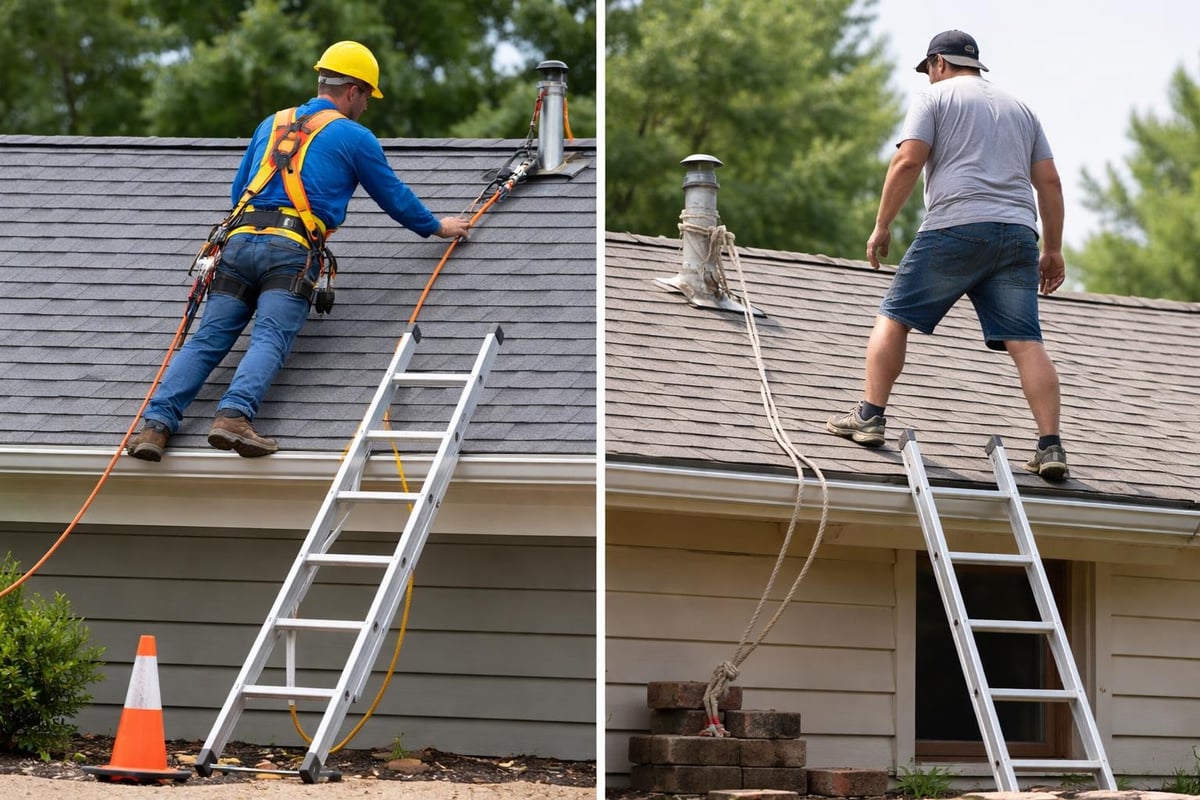
Tarping a roof involves inherent risks that shouldn't be taken lightly. Work Safe Kentucky provides comprehensive safety guidelines that emphasize fall protection and hazard awareness.
Never attempt roof work if:
- The roof is wet, icy, or covered in debris
- Weather conditions include high winds or approaching storms
- The roof structure appears compromised or unstable
- You lack proper safety equipment
- You're working alone without someone to assist
Fall protection is non-negotiable. According to OSHA safety standards for roof work, proper harness systems and anchor points must be used when working at heights. Many homeowners underestimate the dangers and find themselves in situations they can't safely navigate.
Materials and Tools for Effective Roof Tarping
The right materials determine whether your tarp holds through the next storm or fails when you need it most. Not all tarps are created equal, and shortcuts often lead to repeat trips up the ladder.
| Material Type | Best Use | Durability | Cost Range |
|---|---|---|---|
| Heavy-duty polyethylene tarp | Large damaged areas | 3-6 months | $50-$200 |
| Reinforced vinyl tarp | Extended coverage needs | 6-12 months | $100-$400 |
| Canvas tarp | Breathable applications | 2-4 months | $75-$250 |
| Standard blue poly tarp | Small emergency patches | 1-3 months | $20-$75 |
Choose a tarp that extends at least 4 feet beyond the damaged area in all directions. This overlap ensures proper coverage and secure anchoring points.
Essential Equipment Checklist
- Heavy-duty tarp sized appropriately for damage
- 2×4 lumber boards for securing edges
- Galvanized nails or screws (3-inch minimum)
- Sandbags or heavy objects for weighting
- Safety harness and rope system
- Sturdy ladder with stabilizers
- Work gloves and non-slip footwear
- Measuring tape and utility knife
The Home Depot offers detailed guidance on selecting and installing roof tarps that covers material specifications and proper installation techniques.
Step-by-Step Process for Tarping a Roof
Proper installation requires methodical approach rather than rushed improvisation. Each step builds on the previous one to create a weather-resistant temporary barrier.
Measuring and Preparing the Area
Start by assessing the full extent of damage from ground level if possible. Use binoculars to identify all compromised sections before climbing up. Measure the affected area and add at least 4 feet on each side for proper coverage.
Clear any debris, loose shingles, or sharp objects from the installation area. These can puncture your tarp or create uneven surfaces that allow water pooling. If you're dealing with significant storm damage, understanding roof repair options across Eastern North Carolina helps you plan both immediate protection and permanent solutions.
Positioning and Securing the Tarp
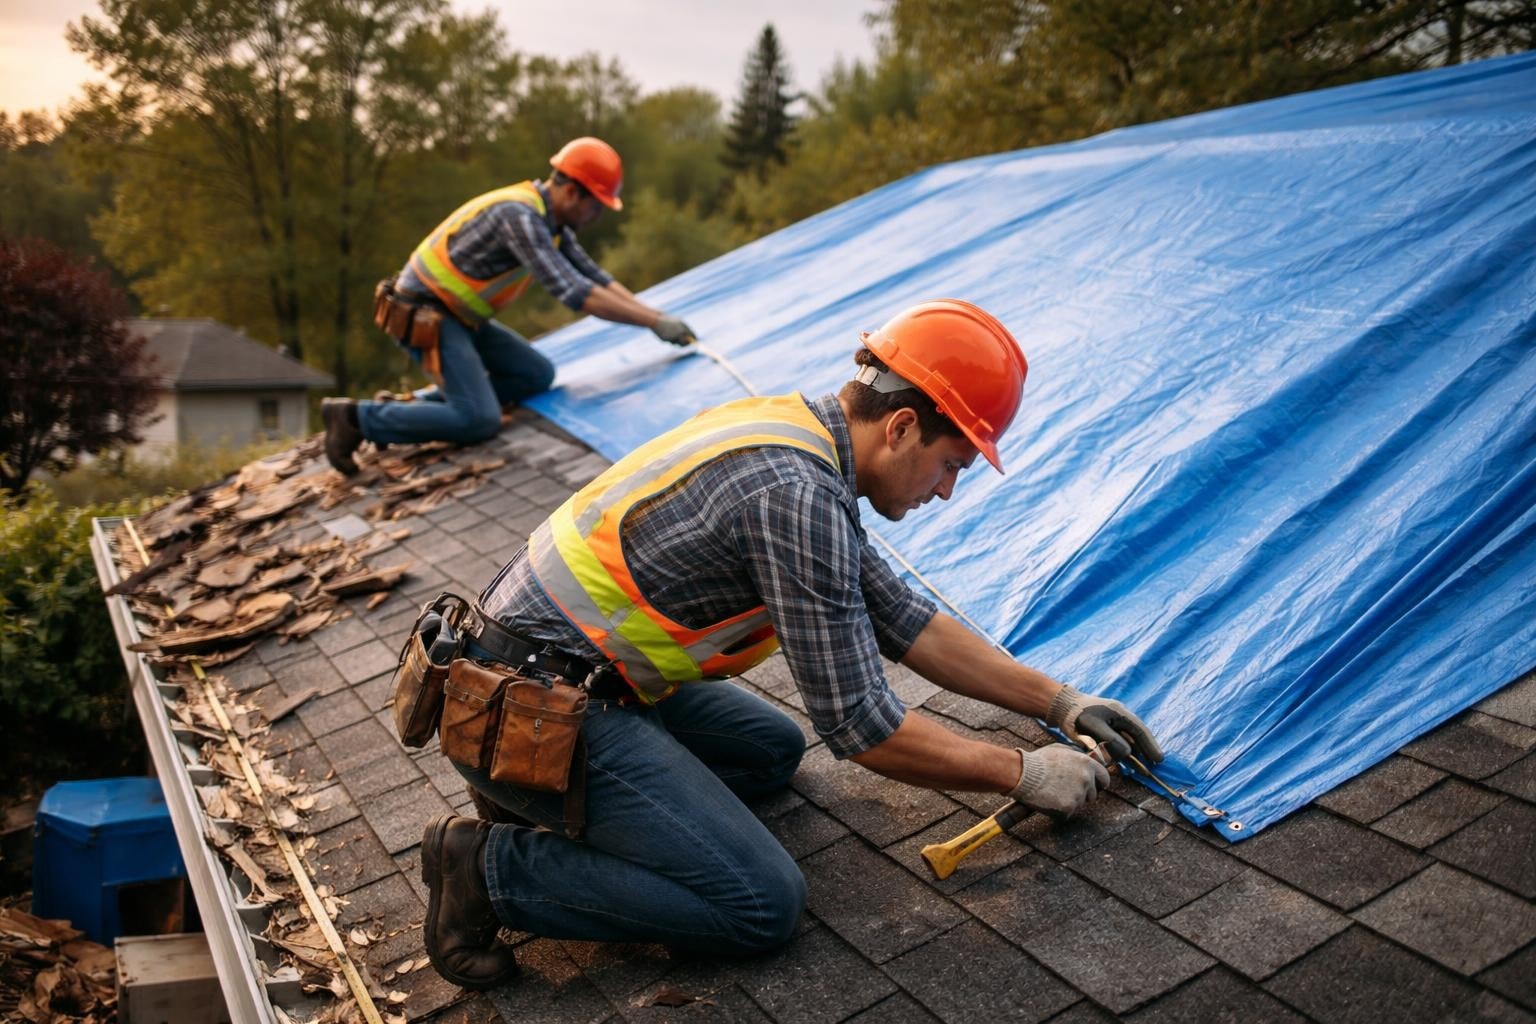
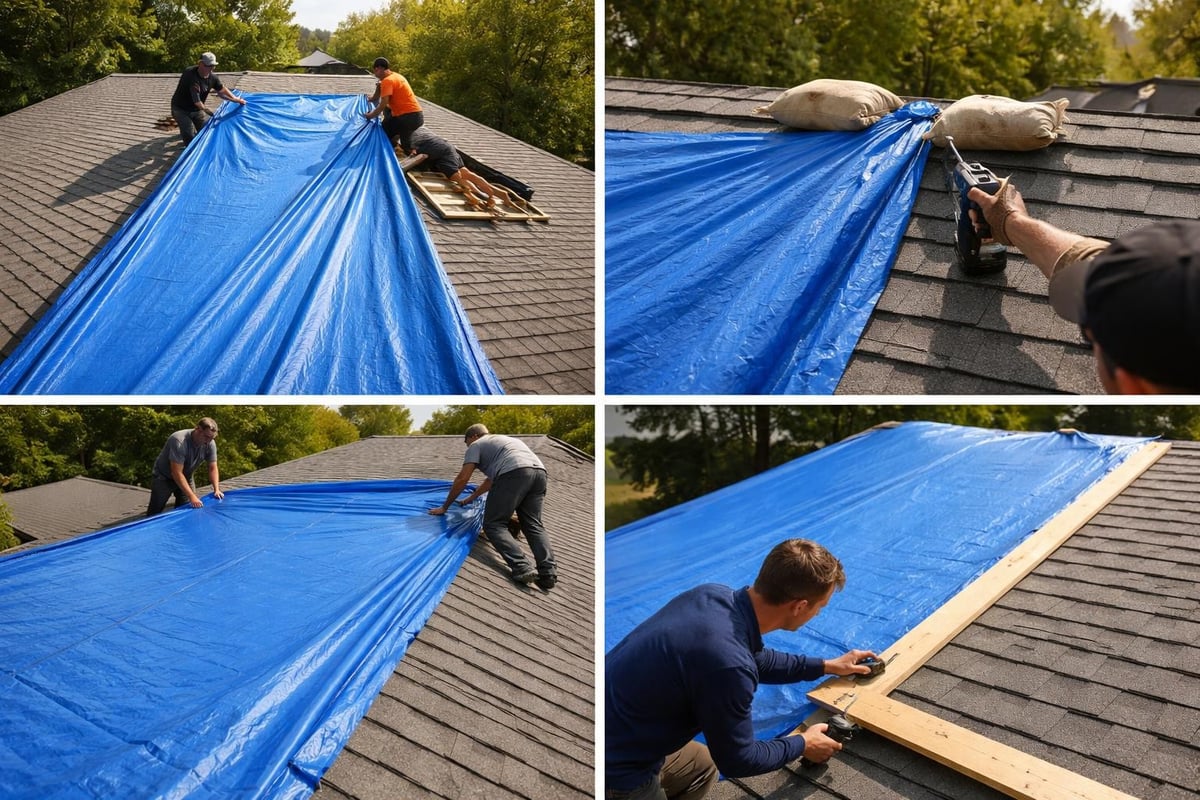
- Unfold the tarp on the ground and orient it to match your roof dimensions
- Carry the folded tarp onto the roof using proper ladder safety techniques
- Position the tarp so it extends from the roof peak down past the damaged area
- Ensure at least 4 feet of overlap on all sides of the damage
The tarp should run vertically from ridge to eave, never horizontally across the roof slope. This orientation allows water to flow down and off rather than pooling behind the tarp.
Anchoring Methods That Hold
Board and nail method (most secure):
- Place 2×4 boards along tarp edges at 18-24 inch intervals
- Nail through board and tarp into roof decking
- Use multiple nails per board section for wind resistance
- Create a "sandwich" effect between tarp and roof surface
Sandbag method (less intrusive):
- Position sandbags every 2-3 feet along tarp perimeter
- Use rope to secure bags and prevent shifting
- Double-layer bags in high-wind areas
- Better for temporary coverage on fragile roofing
Professional installation services like SERVPRO emphasize that proper anchoring prevents tarp failure during subsequent storms and protects against liability if the tarp causes additional damage.
Common Mistakes That Compromise Protection
Even well-intentioned tarping efforts fail when homeowners make preventable errors. Understanding these pitfalls helps you avoid them.
Installation Errors to Avoid
Insufficient overlap ranks as the most common mistake. Tarps that barely cover the damaged area allow water infiltration at the edges, defeating the entire purpose. Always err on the side of more coverage.
Wrinkled or bunched material creates water pockets where rain accumulates until the weight causes sagging or tears. Pull the tarp taut before securing, even if it requires an extra pair of hands.
Inadequate fastening means your tarp becomes a sail in the next windstorm. Use more anchoring points than you think necessary. A tarp that blows off during the night leaves you worse off than before.
| Mistake | Consequence | Prevention |
|---|---|---|
| Too-small tarp | Water intrusion at edges | Measure damaged area plus 4-foot buffer |
| Horizontal installation | Water pooling and leaks | Always install from peak to eave |
| Loose attachment | Wind damage and tarp loss | Anchor every 18-24 inches minimum |
| Sharp debris left behind | Tarp punctures | Clear installation area completely |
Weather-Related Timing Issues
Don't wait for clear skies if another storm approaches. Tarping in light rain beats waiting for perfect conditions while water pours into your home. However, avoid working in high winds, lightning, or heavy downpours where safety becomes impossible to maintain.
Monitor weather forecasts actively. If you know severe weather is coming and you have existing minor damage, tarp before the storm rather than after it worsens the situation.
Professional vs. DIY Considerations
Deciding whether to tarp your roof yourself or hire professionals depends on multiple factors beyond just cost savings.
When DIY Makes Sense
Small damage areas (under 10 square feet), single-story homes with accessible roof pitches, and situations where you have proper safety equipment and assistance make reasonable DIY scenarios. If you're comfortable on ladders, understand basic construction principles, and can work safely at heights, you may handle straightforward tarping jobs.
DIY advantages include:
- Immediate action without waiting for contractor availability
- Lower direct costs for materials only
- Personal control over the process
- Learning experience for future needs
When to Call Professionals
Multi-story homes, steep roof pitches, extensive damage, structural concerns, or any situation involving personal injury risk warrant professional help. The Florida Roofing Association’s safety guidelines highlight the serious hazards that professionals are trained and equipped to handle.
Professional services provide:
- Proper fall protection equipment and training
- Insurance coverage for work-related incidents
- Quick response times for emergency situations
- Documentation for insurance claims
- Warranty on labor and materials
Many homeowners discover too late that their insurance may not cover damage that worsens due to delayed or improper tarping. Professional installation creates a documented timeline that protects your claim.
Insurance and Documentation Requirements
Tarping a roof often precedes insurance claims for permanent repairs. How you handle this temporary measure affects your claim outcome.
Photographing Damage Before Tarping
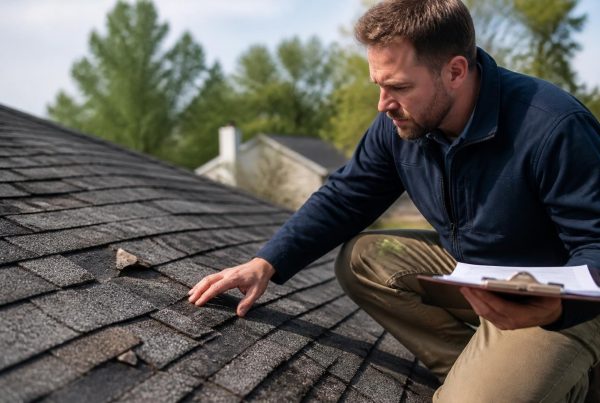
Take extensive photos before covering anything. Capture wide-angle shots showing the overall damage and close-ups detailing specific problem areas. Include reference objects for scale and photograph from multiple angles.
Document these elements:
- All damaged sections from multiple perspectives
- Water intrusion points inside the home
- Debris or objects that caused damage
- Date-stamped images showing timeline
- Video walkthroughs of affected areas
Insurance adjusters rely on this documentation to assess claims. Once you tarp the roof, they can't see the original damage extent without removing your temporary protection.
Saving Receipts and Records
Keep detailed records of all materials purchased and labor costs if you hire help. Insurance policies typically cover reasonable emergency measures to prevent further damage, but you need proof of expenses.
Track your timeline. Note when damage occurred, when you discovered it, and when you completed tarping. This timeline demonstrates you acted promptly to mitigate further loss, which insurance companies expect.
For comprehensive guidance on roofing matters beyond emergency repairs, NC Roofs provides resources on various roofing topics that help Eastern North Carolina homeowners make informed decisions.
Maintenance and Monitoring Your Temporary Repair
Installing a tarp isn't a set-and-forget solution. Regular monitoring ensures continued protection until permanent repairs happen.
Weekly Inspection Routine
Check your tarp weekly at minimum, and always after any weather event. Look for these warning signs:
- Loose or missing fasteners that need reinforcement
- Tears or punctures requiring patches or replacement
- Sagging areas where water might pool
- Edge lifting that could catch wind
- Debris accumulation that needs clearing
Make repairs immediately when you spot problems. Small issues escalate quickly when exposed to weather cycles.
Expected Lifespan and Replacement Timing
Even quality tarps degrade under constant sun exposure and weather cycling. UV radiation breaks down materials, heavy rains test seams, and temperature fluctuations stress attachment points.
Most tarps protect effectively for 3-6 months maximum. If permanent repairs will take longer, plan to replace your tarp before failure. Don't wait until leaks return to take action.
Understanding the Limits of Temporary Protection
Tarping a roof solves immediate problems but creates new considerations that homeowners often overlook.
What Tarps Can and Cannot Do
Tarps stop active water intrusion and prevent additional damage to your home's interior. They buy time to arrange proper repairs and protect your belongings from weather exposure.
However, tarps don't repair structural damage, prevent mold in already-wet materials, or protect against extreme weather events. They're temporary barriers, not substitutes for actual roof repairs.
Planning Your Permanent Repair Timeline
Use your tarped time wisely. Get multiple quotes for permanent repairs, review your insurance coverage, and understand your options. Research roofing and repair approaches that match your home's needs and your budget reality.
Don't let temporary solutions become permanent by default. Tarps degrade, attachment points weaken, and what protected you in spring might fail by winter. Schedule permanent repairs within your tarp's effective lifespan.
The goal is protecting your home until you can restore it properly. Tarping a roof serves this purpose when done correctly, safely, and with realistic expectations about what temporary coverage can achieve.
Proper roof tarping protects your home from further damage while you arrange permanent repairs, but it requires careful attention to safety, materials, and installation methods. If you're dealing with storm damage or roof issues across Eastern North Carolina, NC Roofs provides honest assessments and clear repair options without pressure or unnecessary upsells. Whether you need emergency guidance or permanent solutions, we help you understand exactly what your roof needs and what it will cost.