Noticing damaged shingles on your roof brings up an immediate question: shingles damaged what to do next? Whether you spotted missing pieces after a storm, saw granules washing down your gutters, or noticed curling edges during a yard cleanup, understanding your options helps you make the right call. The good news is that not every damaged shingle means a full roof replacement. Many situations call for targeted repairs that protect your home without breaking the bank. For homeowners in coastal North Carolina, where wind and weather test roofs year-round, knowing how to respond to shingle damage makes the difference between a quick fix and a costly emergency down the road.
Identifying the Type and Extent of Damage
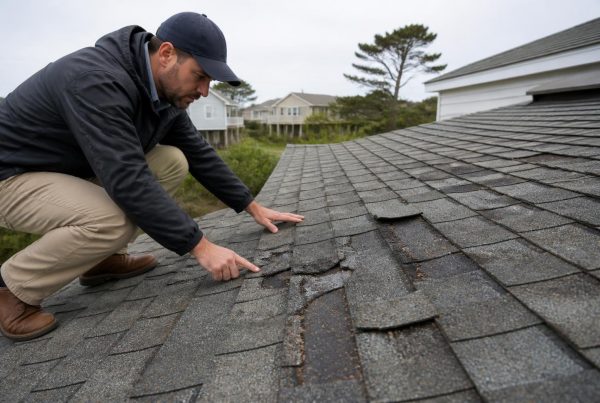
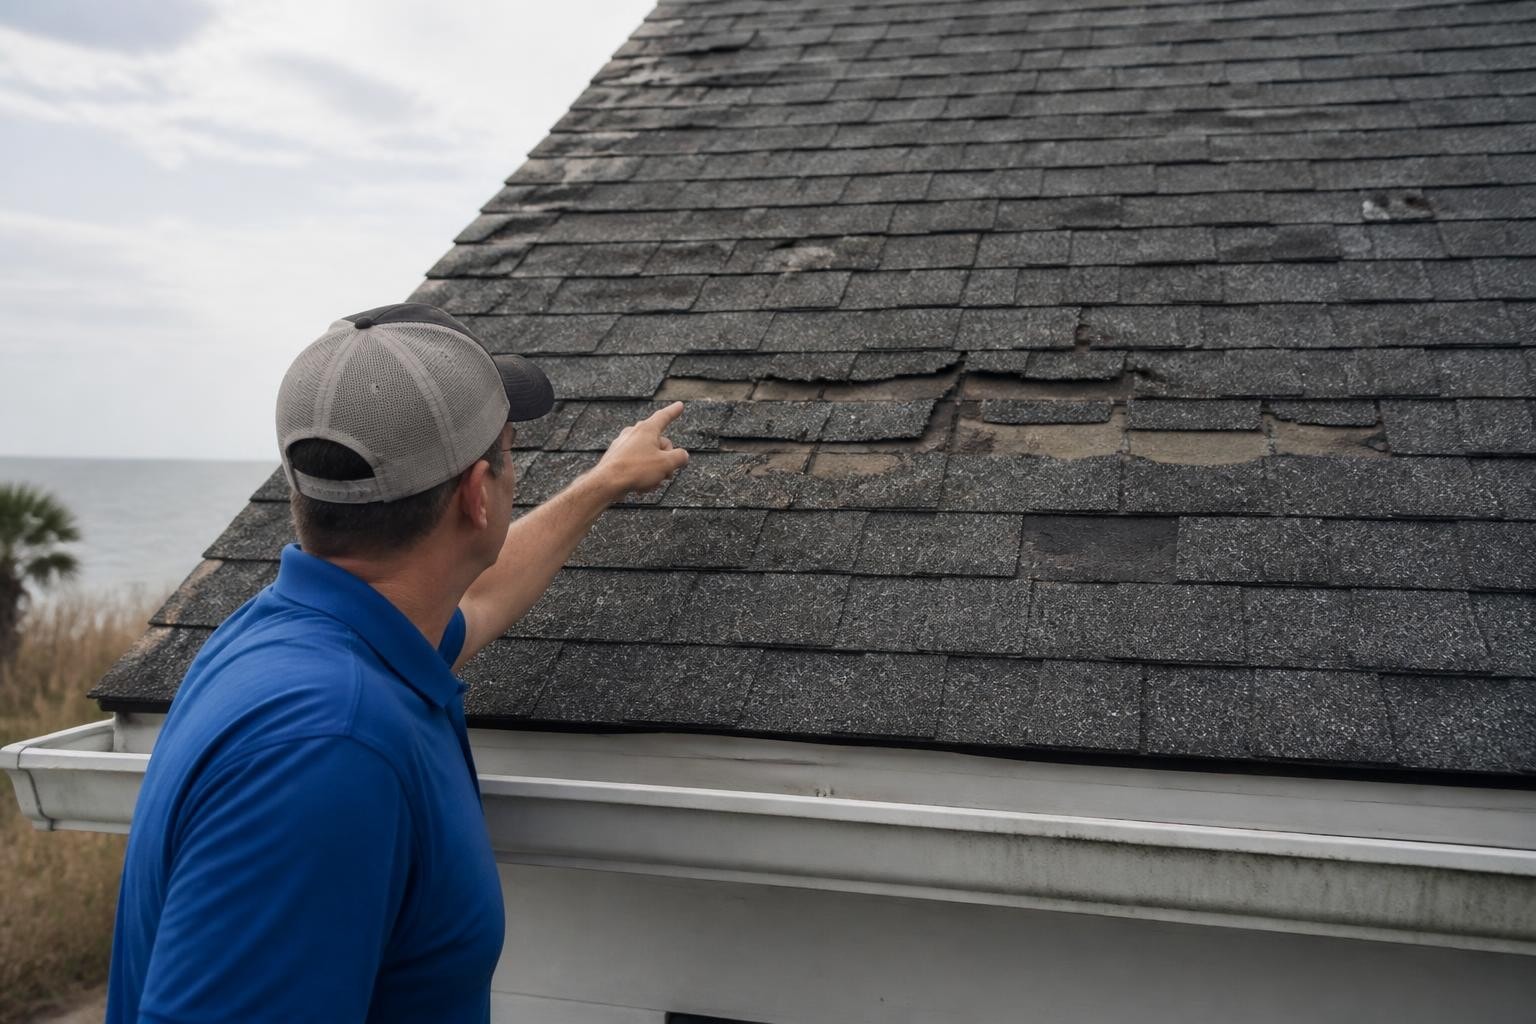
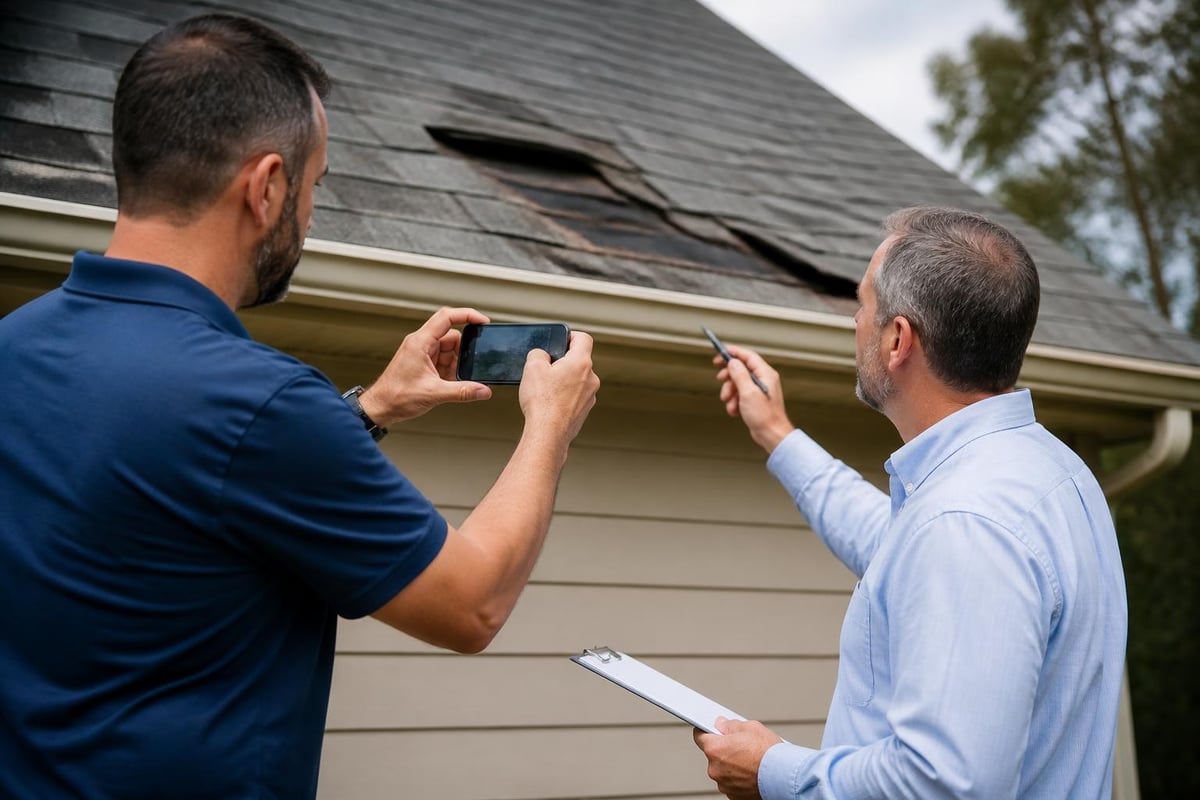
Different types of shingle damage require different responses. Wind damage typically shows up as lifted, creased, or missing shingles, especially along roof edges and ridges where wind speeds increase. Hail damage creates bruises or dents that may not be immediately visible but compromise the shingle's protective granule layer. Age-related wear appears as curling, cupping, or widespread granule loss across multiple areas.
Walking around your property gives you the best ground-level view. Look for:
- Shingles lying in the yard or stuck in gutters
- Dark spots or streaks on the roof surface
- Uneven or wavy sections along roof planes
- Exposed nail heads or lifted corners
Timing matters when assessing damage. After coastal storms, wind-driven rain can exploit even small openings, so a quick inspection helps catch problems before water enters your attic.
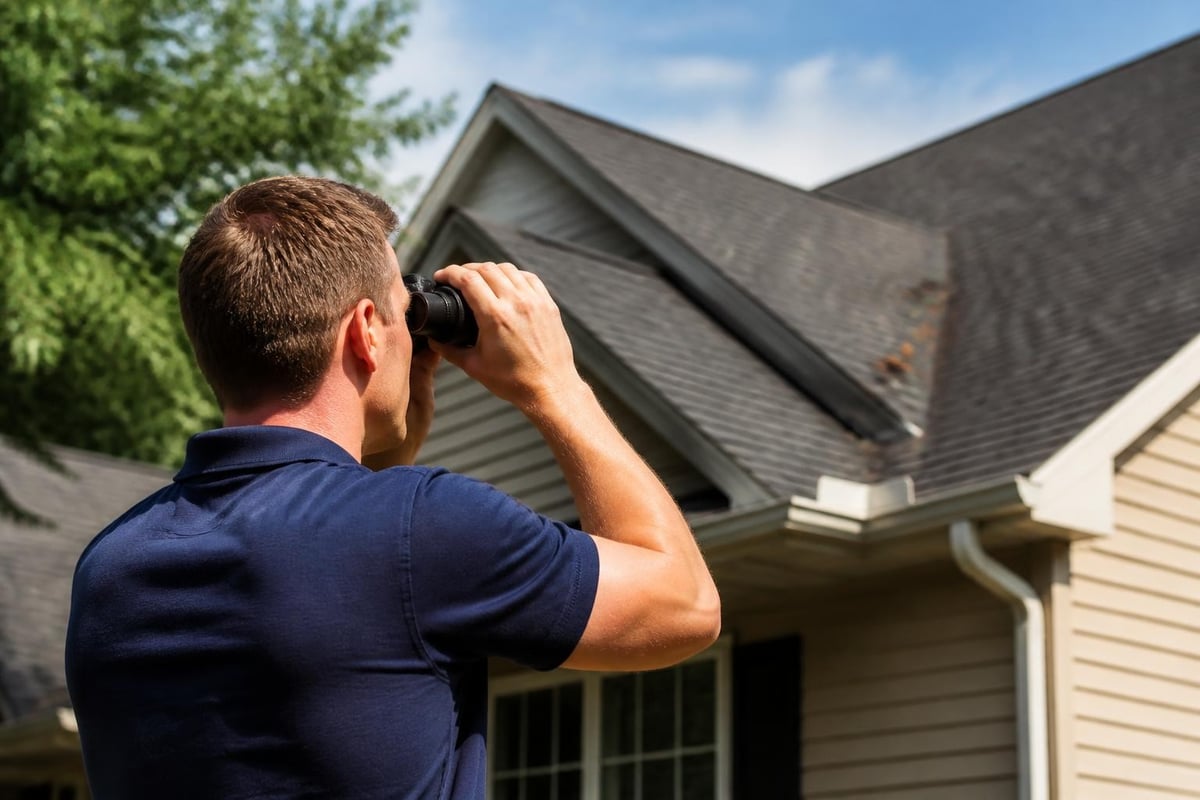
When to Inspect From the Ground
You don't need to climb onto your roof to get useful information. Binoculars let you examine shingles from your yard, checking for obvious gaps, discoloration, or missing sections. Focus on areas where two roof planes meet, around chimneys and vents, and along the edges where wind hits hardest.
Look at your gutters and downspouts after rain. Granule accumulation signals shingle deterioration, especially if you see heavy amounts collecting after every storm. A few granules are normal as shingles settle, but consistent shedding indicates the protective surface is wearing away.
Deciding Between Repair and Replacement
When shingles damaged what to do often depends on how much of your roof is affected. Isolated damage from a fallen branch or a small patch of wind-lifted shingles typically qualifies for repair. Widespread issues across multiple roof sections usually point toward replacement.
| Situation | Repair Makes Sense | Replacement Likely Needed |
|---|---|---|
| Age of roof | Under 12 years | Over 18-20 years |
| Damage extent | Less than 10-15% of roof area | More than 30% of roof area |
| Pattern | Isolated spots, one area | Multiple sections, entire planes |
| Previous repairs | None or minimal | Multiple patches already |
The age of your roof plays a major role in this decision. If your shingles are relatively new and damage is limited, repairs extend your roof's life without the expense of full replacement. But if you're already at year 15 or beyond and damage is showing up in multiple areas, replacement might actually save money long-term compared to repeated repairs.
Cost Considerations That Matter
Repair costs depend on accessibility, material matching, and labor time. Fixing a dozen shingles on a single-story ranch costs far less than addressing scattered damage across a two-story home with steep pitches. The challenge with repairs isn't always the material cost but finding matching shingles, especially if your roof is older and the manufacturer has discontinued that specific color or style.
Repair typically costs:
- $300-$800 for minor localized damage
- $800-$1,500 for moderate damage across one section
- $1,500-$3,000 for extensive repairs requiring scaffolding or multiple areas
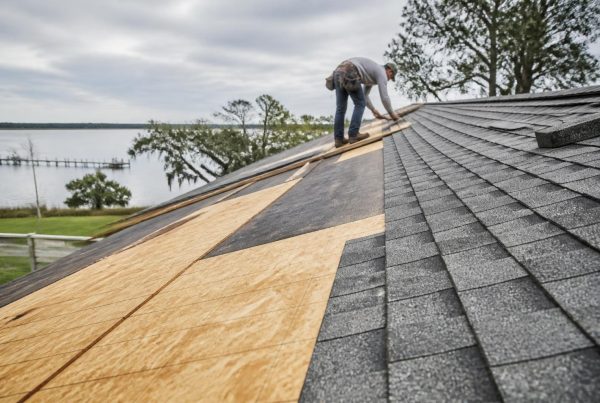
Replacement costs naturally run higher, but they come with benefits repairs can't match: new warranty coverage, improved energy efficiency from modern materials, and peace of mind knowing the entire roof is sound. Understanding when roof repair makes financial sense versus when replacement is the smarter investment saves you from throwing money at a failing roof.
Understanding Storm Damage Specifics
Coastal North Carolina weather delivers wind, rain, and occasional hail that all affect shingles differently. Wind damage often appears as a pattern, with the most severe lifting on corners and edges where suction is strongest. Shingles on the windward side of your home take the brunt of storm forces.
After major weather events, inspect for:
- Lifted or creased shingles that may still be partially attached
- Complete tear-offs leaving exposed underlayment
- Broken seal strips that compromise the shingle's wind resistance
- Debris impact damage from branches or blown objects
The timing of your inspection matters for insurance purposes. Most policies require prompt reporting of storm damage, and understanding how storm damage affects roofing helps you document conditions accurately. Take clear photos from multiple angles, capturing both close-up damage and wider context shots showing the affected areas.
Working With Insurance After Damage
When storm damage occurs, knowing shingles damaged what to do includes understanding your insurance coverage. Most homeowner policies cover sudden damage from wind, hail, or falling objects, but they don't cover wear and tear from age or lack of maintenance.
Contact your insurance company before making repairs beyond emergency tarping. An adjuster needs to see the damage in its original state to approve your claim. Document everything: dates, weather conditions, visible damage, and any temporary measures you took to prevent further harm.
DIY Repairs Versus Professional Help
Some homeowners feel comfortable tackling minor shingle repairs themselves, especially if damage is limited and easily accessible. Replacing a few damaged shingles requires basic tools and careful attention to proper installation techniques, but it's manageable for someone comfortable on a ladder.
DIY makes sense when:
- Damage involves fewer than 5-8 shingles in an accessible area
- You have proper safety equipment and experience working at heights
- Matching shingles are readily available
- The roof pitch is moderate and weather conditions are favorable
Professional help is needed when:
- Damage covers large areas or multiple roof sections
- Your roof has steep pitches or complex angles
- You need insurance documentation and certification
- Underlying structure might be compromised
- Safety concerns exist due to height or access
The main risk with DIY repairs isn't just safety, though that's paramount. Improper installation can void warranties, create new leak points, or fail to address hidden damage beneath the visible shingles. Even well-intentioned fixes sometimes cause more problems than they solve if flashing details, underlayment, or nail patterns aren't handled correctly.
Tools and Materials for Basic Repairs
If you decide to handle minor repairs yourself, having the right materials matters. You'll need replacement shingles that match your existing roof, roofing nails, a pry bar for removing damaged shingles, roofing cement or sealant, and basic safety equipment including a stable ladder and roof brackets if needed.
| Material/Tool | Purpose | Typical Cost |
|---|---|---|
| Replacement shingles | Match existing roof | $1-3 per shingle |
| Roofing nails | Secure new shingles | $8-15 per pound |
| Pry bar | Remove damaged pieces | $12-25 |
| Roofing cement | Seal edges and repairs | $6-12 per tube |
| Safety harness | Fall protection | $50-150 |
Work only in dry, calm conditions. Wet or windy weather makes roof work dangerous and prevents proper adhesion of sealants and shingles. Morning work often provides the best conditions, before afternoon heat softens shingles and makes them more prone to damage during handling.
Recognizing When Damage Goes Beyond Shingles
Sometimes what looks like simple shingle damage indicates deeper issues. Water stains on your ceiling, sagging sections of roof deck, or visible rot around roof penetrations all signal that damage has progressed beyond the surface layer.
Check your attic after discovering damaged shingles. Look for:
- Daylight showing through roof boards indicates serious structural gaps
- Water stains or dampness on rafters or insulation
- Mold or mildew growth from prolonged moisture exposure
- Sagging or soft spots in the roof deck
When shingles damaged what to do includes investigating these warning signs before committing to simple repairs. Replacing shingles over damaged decking or wet insulation just hides the problem temporarily. You need to address the underlying cause to prevent recurring issues.
Flashing and Underlayment Concerns
Shingle damage often reveals compromised flashing around chimneys, vents, and valleys. These critical areas prevent water infiltration, and if damage extends to these components, repairs need to address more than just the shingles themselves.
How roof components work together: shingles, underlayment, flashing, and decking interaction to create complete water protection system for homes
Underlayment, the protective barrier beneath shingles, deteriorates over time and can tear when shingles lift or blow off. If you can see the underlayment during your inspection and it appears cracked, brittle, or torn, repairs should include replacing this layer to maintain proper protection.
Preventive Measures After Repairs
Once you've addressed damaged shingles, taking steps to prevent future problems extends your roof's life and saves money. Regular maintenance isn't complicated, but it makes a real difference in how your roof handles coastal weather.
Schedule seasonal inspections twice yearly, ideally in spring and fall. These checks catch small issues before they become major repairs. You're looking for loose or lifted shingles, damaged flashing, clogged gutters, and debris accumulation.
Keep trees trimmed back from your roof. Overhanging branches drop leaves that hold moisture and scrape shingles during wind events. The shade from dense tree cover also promotes moss and algae growth, which degrades shingle surfaces over time.
Gutter Maintenance and Roof Longevity
Clean gutters protect your roof by directing water away from edges and preventing backup that can work under shingles. Clogged gutters cause water to pool along roof edges, especially during heavy coastal rains, creating conditions for leaks and rot.
Many homeowners in Eastern North Carolina benefit from regular spring maintenance routines that include gutter cleaning, shingle inspection, and minor repairs before summer storm season begins. This timing helps identify winter damage and prepare your roof for the challenging months ahead.
Making Your Decision With Confidence
Understanding shingles damaged what to do comes down to honest assessment of your roof's condition, age, and the extent of current damage. There's no universal answer because every roof and every damage situation differs. A ten-year-old roof with localized wind damage calls for a completely different approach than a twenty-year-old roof showing widespread deterioration.
Get multiple opinions if you're unsure. A trustworthy roofing contractor walks your property with you, explains what they see, and presents options without pressure. They'll tell you when repairs make sense and when they're just delaying the inevitable.
Ask specific questions:
- What caused this damage?
- Is the damage limited to what I can see, or are there hidden issues?
- Will repairs address the root cause or just the symptoms?
- How long can I expect repairs to last given my roof's age and condition?
- What's the cost difference between comprehensive repairs and replacement?
The answers help you make an informed decision based on your specific situation, budget, and long-term plans for your home.
Documentation for Future Reference
Keep records of all repairs, inspections, and maintenance. This documentation proves valuable when filing insurance claims, selling your home, or deciding whether additional repairs make sense down the road. Photos, receipts, and written summaries of work completed create a history that informs future decisions.
Exploring detailed repair guidance from trusted sources supplements the advice you receive from local contractors and helps you understand the scope of work being recommended. Education puts you in control of decisions affecting your home and budget.
Timeline Expectations for Repairs and Replacement
Once you've decided on repairs, timeline matters. Emergency repairs after storm damage should happen within days to prevent further water intrusion. Standard repairs for isolated damage can usually be scheduled within a week or two, depending on contractor availability and weather conditions.
Full replacement takes longer, typically ranging from one to three days for most residential roofs, though complex homes or poor weather can extend this timeline. Good contractors explain the schedule upfront and communicate about any delays.
Typical repair timelines:
- Minor patch repairs: 2-4 hours
- Moderate single-section repairs: Half day to full day
- Extensive multi-area repairs: 1-2 days
- Full roof replacement: 1-3 days
Weather plays a major role in scheduling. Roofing work requires dry conditions, and coastal areas sometimes face delays when storms roll through. Contractors can't control weather, but they should communicate clearly about scheduling and reschedule promptly when conditions improve.
Damaged shingles need attention, but understanding your options helps you respond appropriately without panic or overspending. Whether you need targeted repairs or a complete roof replacement depends on your specific situation, and getting clear answers before making decisions protects both your home and your budget. When you're ready to understand exactly what's happening with your roof, the team at NC Roofs provides honest assessments and straightforward recommendations tailored to coastal North Carolina homes.