Wind storms along the North Carolina coast bring more than just noise and rain. They test every part of your roof, from the shingles holding firm against gusts to the flashing protecting vulnerable edges. After the wind settles, knowing what to look for can mean the difference between catching a small issue early and facing a major repair bill later. Understanding roof damage after wind storm what to check helps you act quickly, document problems correctly, and make informed decisions about repairs without second-guessing yourself.
Start With a Safe Exterior Assessment
Your initial inspection should happen from the ground. Walking around your property with a clear view of the roofline gives you a solid first look at potential damage without putting yourself at risk.
Look for these obvious signs:
- Missing or displaced shingles
- Shingles lifted at the edges or corners
- Granule buildup in gutters and downspouts
- Visible gaps in flashing around chimneys or vents
- Dented or damaged roof vents
Binoculars help you see details without climbing. Take photos of anything that looks different from before the storm. These images become valuable documentation if you need to file an insurance claim or discuss options with a contractor.
Pay special attention to roof edges and corners. Wind hits these areas hardest, and understanding roof storm damage patterns shows that perimeter damage often spreads inward if left unaddressed.
Check the Ground Around Your Home
Debris tells a story. Walk your yard and look for shingle pieces, metal flashing fragments, or granules that look like coarse sand. Fresh shingle pieces mean recent loss, while older fragments might have been sitting there from previous weather events.
| What You Find | What It Means | Priority Level |
|---|---|---|
| Whole shingles | Direct blow-off from high winds | High |
| Shingle corners/tabs | Edge lifting or tab tearing | Medium to High |
| Metal pieces | Flashing or vent damage | High |
| Heavy granules | Surface wear or hail impact | Medium |
| Small debris/twigs | Normal storm cleanup | Low |
Document the location where you find debris. This helps pinpoint which sections of your roof need closer attention.
Inspect Your Attic for Interior Damage
What happens on top of your roof shows up inside your attic. This space reveals problems that aren't visible from the ground and catches issues before they affect your living areas.
Turn off the lights and look for daylight coming through the roof decking. Any pinprick of light means a hole or separation. Check for water stains on rafters, insulation, or decking. Fresh stains appear darker and may still feel damp, while old stains look faded and dry.
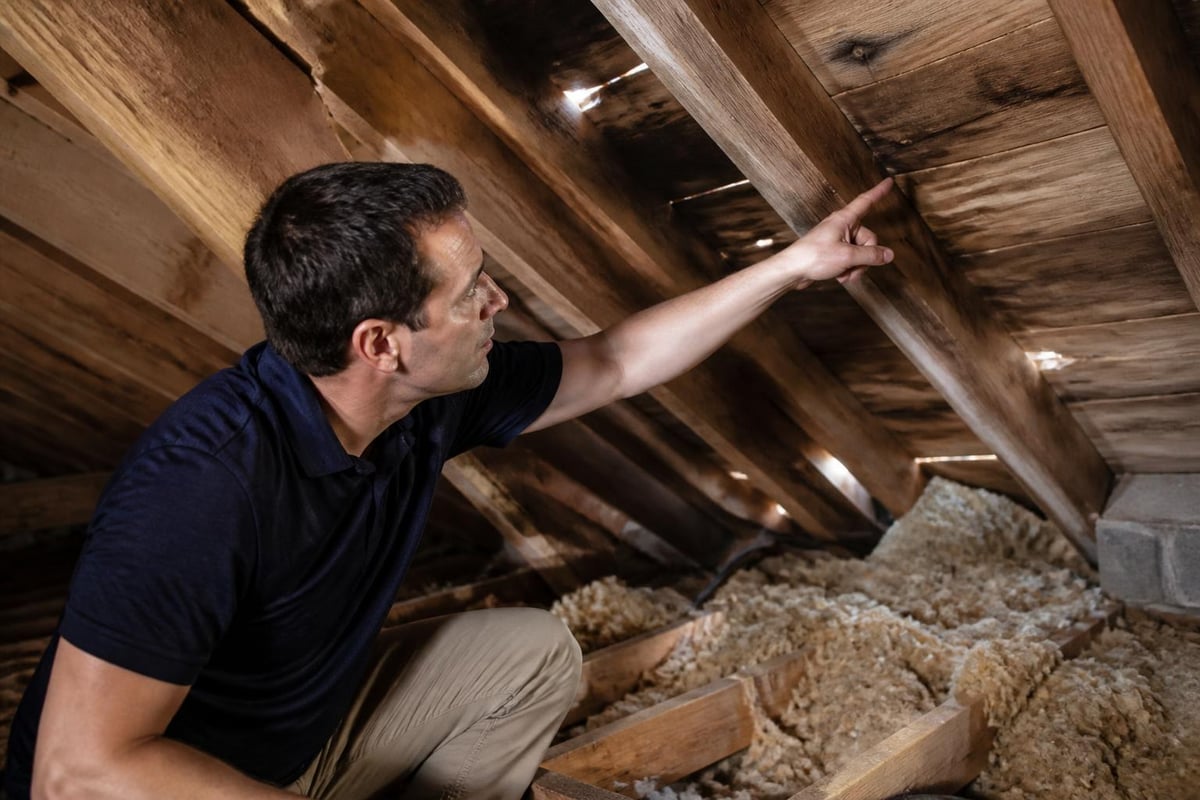
Run your hand along the underside of the roof deck if you can safely reach it. Soft spots or sagging indicate water damage that may have been building before the storm or entered during the event.
Watch for Moisture and Mold
Moisture doesn't always appear immediately. Sometimes it takes days for water to work through layers and become visible. Check your attic again three to five days after the storm, especially if rain accompanied the wind.
Look for these moisture indicators:
- Musty odors that weren't present before
- Darker wood coloring on rafters or decking
- Wet or compressed insulation
- Condensation on metal components
- Small spots of mold growth
Early moisture detection prevents bigger problems. A small leak caught now stays a small repair instead of becoming a full shingle replacement project later.
Examine Flashing and Roof Penetrations
Flashing protects the spots where your roof meets chimneys, vents, skylights, and walls. Wind finds these weak points and exploits any gaps or loose sections.
Check these critical flashing areas:
- Chimney base: Look for gaps between flashing and brick or separation from the roof surface
- Pipe boots: Rubber seals crack and metal collars loosen under wind stress
- Skylight edges: Flashing here takes direct wind pressure and water flow
- Valley flashing: Where two roof planes meet, flashing channels water and must stay sealed
- Drip edge: The metal strip at roof edges keeps water from backing under shingles
Loose flashing often looks fine from a distance but shows gaps or lifted edges up close. Wind can peel back sections without fully removing them, creating entry points for water during the next rain.
Many homeowners appreciate starting with roof repair services that focus on these vulnerable points, since targeted fixes often restore full protection without replacing entire roof sections.
Assess Shingle Condition and Patterns
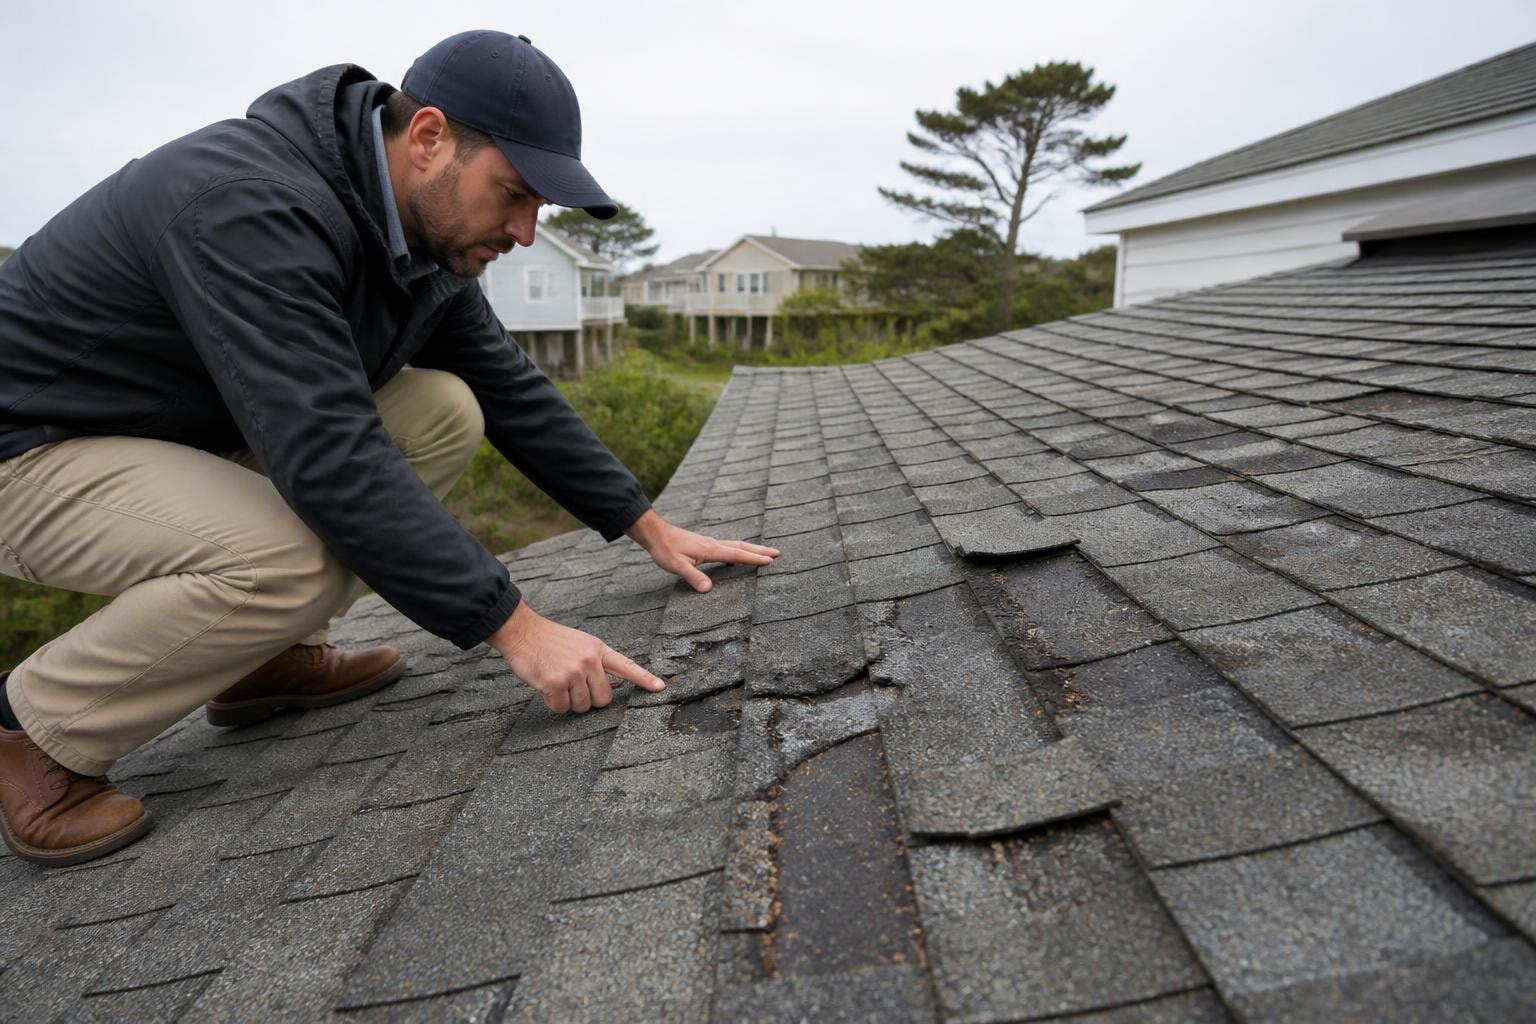
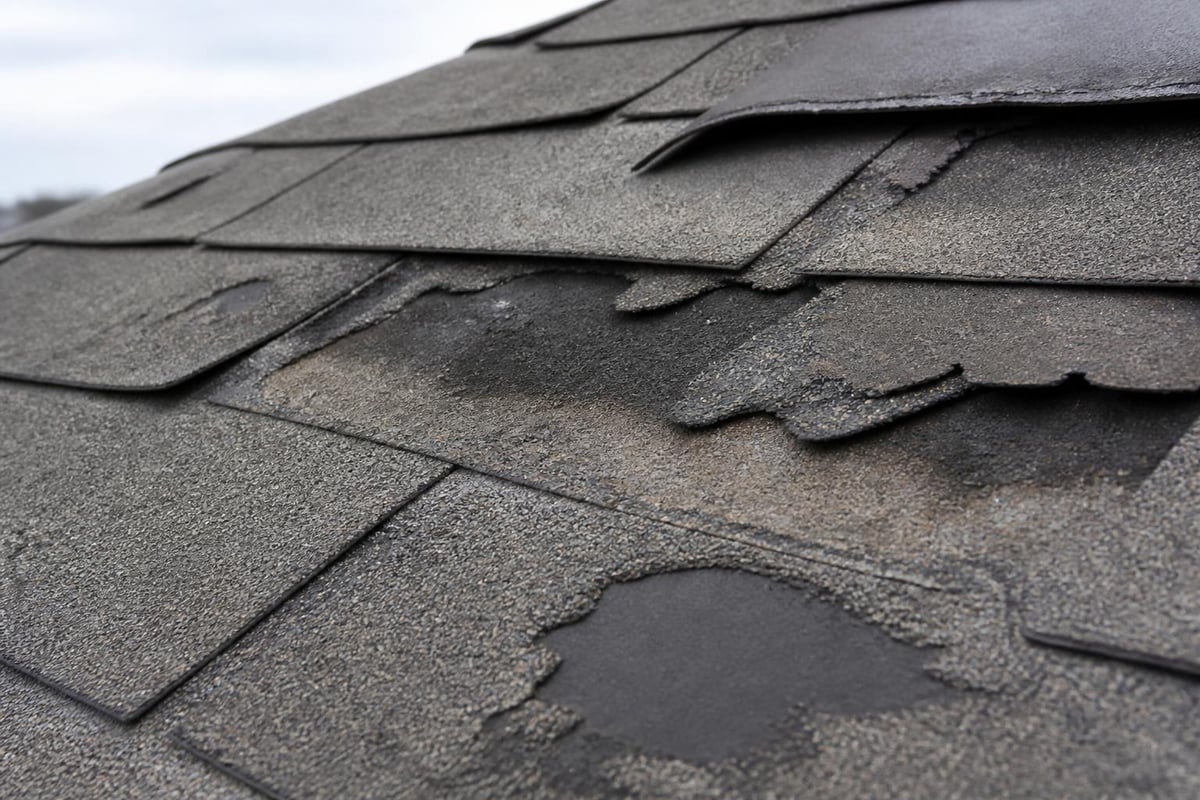
Wind damage to shingles follows patterns. Understanding these patterns when considering roof damage after wind storm what to check helps you see the full scope of the issue.
Common wind damage patterns include:
- Edge lifting: Perimeter shingles lift first due to direct wind exposure
- Tab tears: Three-tab shingles lose individual tabs while the rest stays attached
- Creasing: Shingles fold under pressure, creating weak lines that crack later
- Seal failure: The adhesive bond between shingle layers breaks, allowing future lifting
Understand Shingle Seal Strips
Most asphalt shingles have a tar-like adhesive strip that bonds each shingle to the one below it. This seal takes months to fully cure on new roofs and weakens with age on older ones.
Wind tests these seals. When seals fail, shingles lift, flutter, and eventually tear or blow off completely. You might see shingles that look intact but feel loose when pressed (don't walk on your roof to test this yourself).
| Shingle Age | Typical Seal Strength | Wind Vulnerability |
|---|---|---|
| Under 6 months | Developing | Moderate |
| 1-10 years | Peak strength | Low to Moderate |
| 10-20 years | Good to Fair | Moderate |
| Over 20 years | Weakening | High |
Age matters when evaluating wind damage. A ten-year-old roof losing shingles in 70 mph winds points to installation issues or defects. A 22-year-old roof losing shingles in the same storm might simply be showing normal wear.
Document Everything With Photos and Notes
Your documentation becomes your evidence. Insurance adjusters, contractors, and even your own memory benefit from clear records of what you found and when you found it.
Take photos from multiple angles:
- Wide shots showing the full roof section
- Medium shots highlighting specific damaged areas
- Close-up shots of individual problems
- Ground-level debris photos with a reference object for scale
Add written notes with dates, locations, and descriptions. "Southeast corner, three shingles missing, photo taken May 26, 2026" gives context that photos alone don't provide.
Create a Damage Map
Sketch a simple overhead view of your roof. Mark damaged areas with notes or numbers that correspond to your photos. This map helps contractors understand the scope quickly and ensures nothing gets missed during repairs.
Include measurements when possible. "Damaged area approximately 6 feet by 4 feet" provides clearer information than "medium-sized damaged spot."
Following a comprehensive storm damage checklist ensures you capture all the details that matter for repairs and claims.
Check Gutters, Downspouts, and Drainage
Gutters do more than catch water. They show you what's happening on your roof surface and whether wind affected your drainage system.
Look inside gutters for:
- Granules: Excessive granule loss means shingle surface damage
- Shingle pieces: Direct evidence of blow-off or tearing
- Dents: Hail damage if the storm included ice
- Separation: Gutter sections pulled away from the fascia
Downspouts should be firmly attached and draining properly. Wind can disconnect joints or knock entire sections loose. Check where downspouts meet the ground to ensure water flows away from your foundation.
Clogged gutters after a storm create secondary problems. Backed-up water can work under shingles at the roof edge, causing damage that wouldn't have occurred if drainage worked properly.
Look for Structural Movement or Sagging
Severe wind can stress your roof's structure. While less common than shingle damage, structural issues require immediate attention.
Walk through your home and look up at ceilings. New cracks, especially running along seams or appearing in multiple rooms, might indicate roof movement. Doors or windows that suddenly stick or don't close properly can signal frame shifting.
Outside, sight along your roof ridge. It should run straight without dips or humps. A sagging ridgeline means structural support has failed somewhere.
Structural warning signs:
- Visible sagging or bowing in the roof plane
- Cracked or split rafters (visible from the attic)
- Nail pops in the roof deck
- Separation between roof and walls
- Leaning chimney or offset flashing
These issues go beyond typical wind damage and need professional evaluation immediately. Don't wait to address structural concerns.
Evaluate Hidden Damage Behind Fascia and Soffits
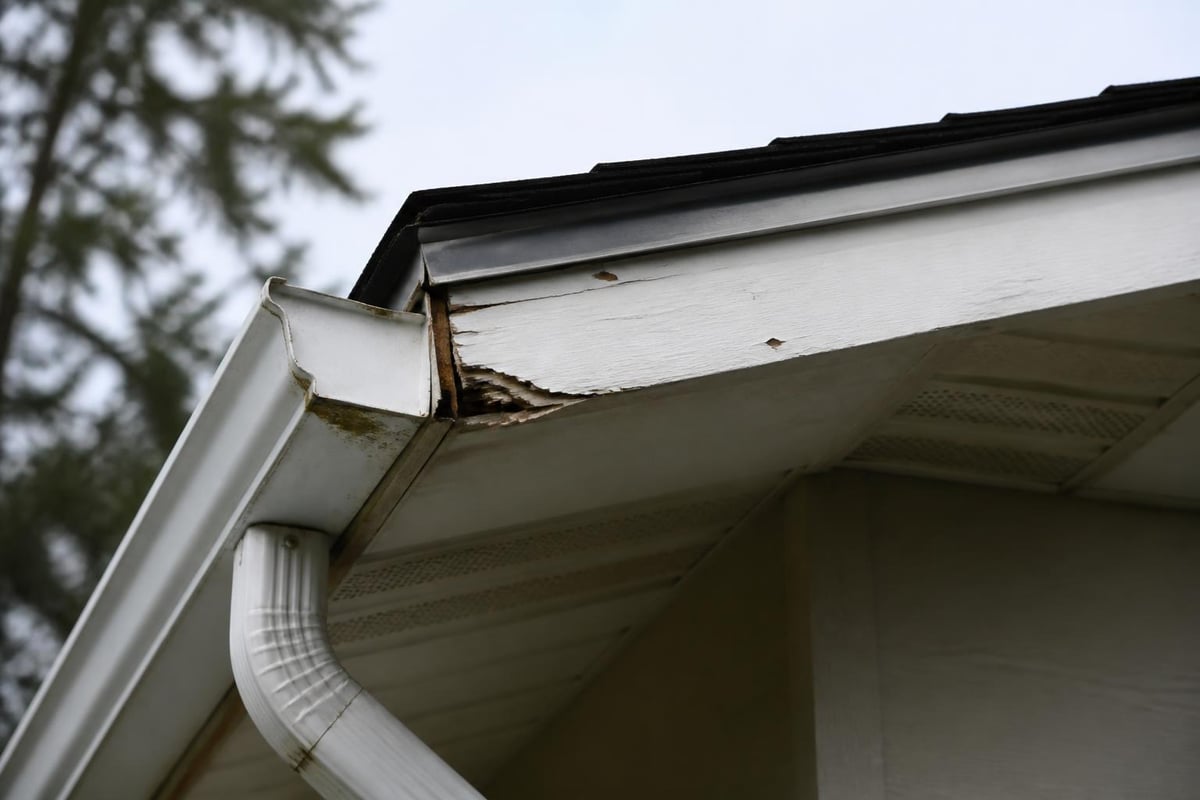
Fascia boards and soffits protect the edges of your roof structure. Wind can damage these components while leaving shingles intact, or damage them as a secondary effect of other problems.
Check fascia boards for cracks, splits, or sections pulling away from the roof edge. Water stains on fascia suggest drainage problems or shingle edge failure above.
Soffit vents should be intact and properly attached. Missing or damaged soffit panels allow wind-driven rain into your attic space and reduce essential ventilation.
Ventilation System Impact
Proper roof ventilation depends on intake vents (usually in soffits) and exhaust vents (ridge vents, box vents, or turbines). Wind can damage both types.
Look for dented or displaced ridge vents, missing turbine caps, or box vents with cracked housings. Damaged ventilation affects more than just the immediate area because it disrupts airflow across the entire attic space.
Understand When DIY Inspection Isn't Enough
Ground-level inspection covers a lot, but some damage requires professional eyes. Knowing when to call for help protects you from both missing critical issues and taking unnecessary risks.
Call a professional if you:
- See widespread shingle loss across multiple roof sections
- Notice any structural sagging or movement
- Find active leaks but can't locate the source
- Have a steep roof pitch that makes ground viewing difficult
- Live in a multi-story home where details aren't visible from below
Professional inspections reveal problems invisible from the ground. Trained eyes spot subtle issues like broken seals, insufficient fastening, or wear patterns that predict future failures.
Research on post-storm building damage assessment shows that systematic professional evaluation catches significantly more damage than homeowner inspection alone, especially for less obvious structural issues.
Know Your Timeline for Action
Time matters after wind damage. Some issues worsen quickly while others remain stable for weeks. Understanding urgency helps you prioritize.
Immediate action needed (within 24-48 hours):
- Active leaks entering living spaces
- Missing shingles exposing roof deck
- Damaged flashing around chimneys or skylights
- Structural movement or sagging
- Compromised ventilation in upcoming severe weather
Short-term action needed (within 1-2 weeks):
- Multiple shingles lifted but still attached
- Granule loss across large areas
- Fascia or soffit damage
- Gutter separation or drainage issues
Monitor and plan (can wait 2-4 weeks):
- Minor edge lifting on a few shingles
- Small amounts of debris in gutters
- Cosmetic damage without water entry risk
Don't confuse "can wait" with "ignore." All damage needs addressing eventually. The timeline just helps you prioritize when multiple issues exist or when scheduling constraints apply.
Prepare for the Insurance Process
If damage warrants an insurance claim, preparation improves your outcome. Insurance adjusters need evidence, and the quality of your documentation affects claim processing.
Keep all storm-related information organized:
- Photos with dates and descriptions
- Written damage notes
- Contact information for any temporary repairs
- Estimates from contractors (multiple if possible)
- Receipts for any emergency mitigation work
Many homeowners benefit from understanding emergency preparation strategies before storms hit, including knowing their coverage limits and deductibles.
Report damage to your insurance company promptly, but don't rush into repairs before the adjuster visits unless emergency mitigation is necessary to prevent further damage. Temporary tarping to stop active leaks is acceptable and often expected. Removing damaged shingles or making permanent repairs before inspection can complicate claims.
Consider Storm-Specific Risk Factors
Coastal North Carolina faces unique wind patterns. Understanding these patterns when evaluating roof damage after wind storm what to check helps you know what's normal for the area versus exceptional damage.
Regional considerations include:
- Salt air exposure: Accelerates metal corrosion on flashing and fasteners
- Hurricane-force winds: Create uplift pressure that standard wind rarely produces
- Wind-driven rain: Pushes water into gaps that normal rain wouldn't penetrate
- Debris from nearby structures: Coastal areas often have wind-borne damage from other properties
Your roof's exposure matters too. Homes near the beach or on open lots experience stronger wind than homes sheltered by trees or other buildings. Damage severity should be evaluated in context of your specific location.
Don't assume that because your neighbor's roof looks fine, yours should too. Small differences in installation quality, age, or orientation create big differences in wind resistance.
Plan Your Next Steps Based on Findings
Once you've completed your inspection and documented everything, decide on a path forward. Not all damage requires immediate professional repair, but all damage deserves a plan.
| Damage Severity | Recommended Action | Typical Timeline |
|---|---|---|
| No visible damage | Monitor after next storm | Ongoing |
| Minor cosmetic issues | Schedule routine inspection | 1-3 months |
| Moderate damage (few shingles) | Get professional estimate | 2-4 weeks |
| Significant damage (multiple areas) | Call contractor immediately | Within days |
| Structural concerns | Emergency professional inspection | Same day |
Remember that wind damage often appears in combinations. You might have missing shingles plus damaged flashing plus compromised ventilation. Address issues in order of urgency, but don't ignore secondary problems just because they seem less critical.
The goal isn't perfection in your inspection. The goal is gathering enough information to make an informed decision about whether professional help is needed and how quickly. When in doubt, getting a professional opinion costs less than ignoring a problem that grows.
Understanding roof damage after wind storm what to check gives you the knowledge to act quickly and make smart decisions about your home's protection. Whether you find minor issues that need monitoring or significant damage requiring immediate attention, having a clear picture of your roof's condition puts you in control. If you're in Hampstead, Topsail, Surf City, Holly Ridge, Wilmington, or surrounding coastal areas and need an honest assessment of storm damage, NC Roofs provides clear roof reports and straightforward recommendations that help you understand exactly what needs attention and why.