
Roofing lead flashing plays a quiet but critical role in keeping your home dry. This specialized material creates a waterproof barrier at roof transitions, chimneys, walls, and penetrations where shingles alone can't do the job. For Eastern North Carolina homeowners dealing with coastal weather patterns, understanding this component helps you spot problems early and make informed decisions about repairs. Lead flashing has been used for centuries because it's flexible, durable, and forms tight seals around complex roof features. When it works properly, you never think about it. When it fails, you get leaks in places that are hard to trace and expensive to ignore.
What Roofing Lead Flashing Actually Does
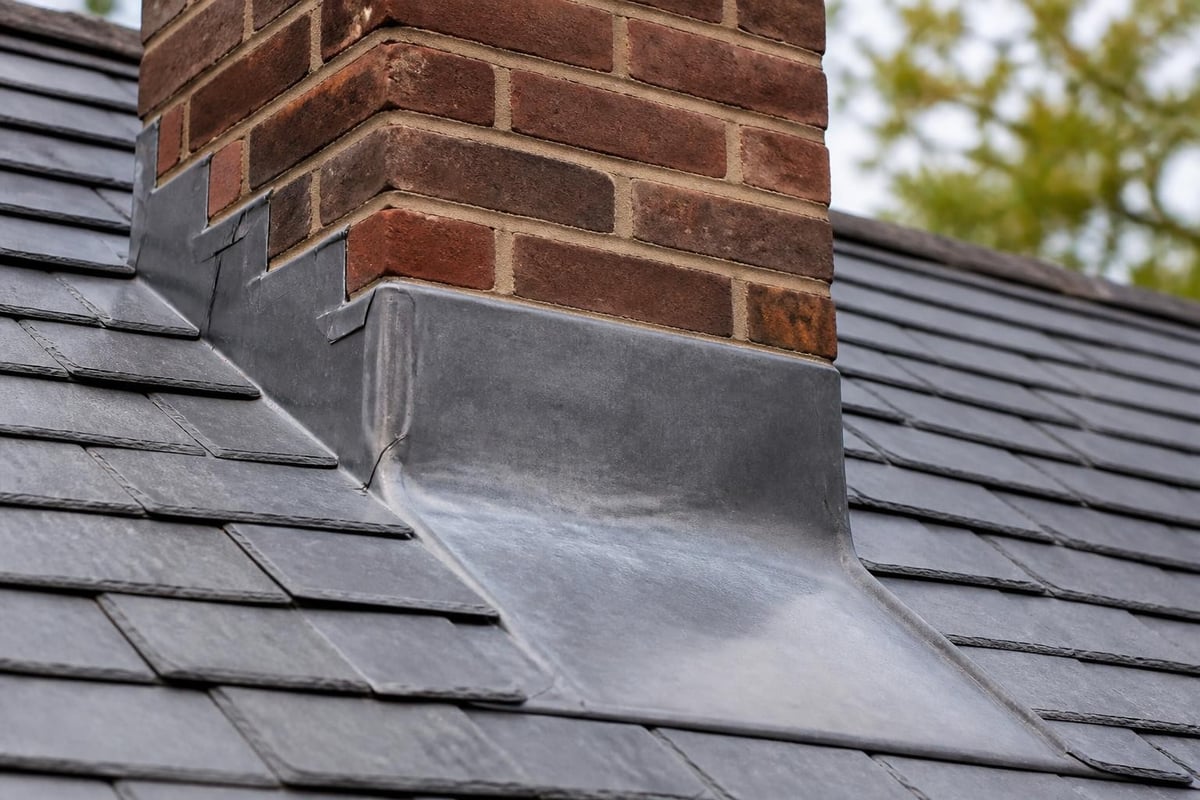
Roofing lead flashing serves one primary purpose: directing water away from vulnerable areas where two roof planes meet or where something penetrates the roof surface. Think of it as a custom-fitted gutter system for the spots where regular roofing materials can't form a complete seal.
Common locations for lead flashing include:
- Chimney bases and sides
- Soil stack pipes (plumbing vents)
- Wall-to-roof junctions
- Dormer windows
- Skylight perimeters
- Roof valleys (though other materials are also used)
The material itself is soft lead sheeting that roofers shape on-site to fit the exact contours of each installation. This malleability is exactly why lead works so well in roofing applications. A skilled installer can bend, fold, and form it to create watertight transitions that accommodate the movement every roof experiences through temperature changes and settling.
Lead vs. Other Flashing Materials
Not all flashing is made from lead. Modern roofing uses several materials depending on the application, budget, and expected lifespan of the roof.
| Material | Lifespan | Best Use | Considerations |
|---|---|---|---|
| Lead | 75-100+ years | Chimneys, complex transitions | Expensive, requires skilled installation |
| Aluminum | 20-30 years | Drip edges, simple transitions | Lightweight, affordable, can corrode |
| Copper | 70+ years | High-end installations | Beautiful patina, very expensive |
| Galvanized Steel | 15-25 years | Budget applications | Rusts over time, needs maintenance |
| EPDM Rubber | 15-25 years | Pipe boots, simple penetrations | Flexible, affordable, UV degrades it |
Lead stands out for its longevity and performance in coastal environments. Salt air accelerates corrosion in metal flashings like aluminum and galvanized steel, but lead develops a protective patina that actually slows degradation. For Wilmington and surrounding coastal communities, this durability matters when you're balancing repair costs against how long the fix will last.
The National Roofing Authority provides detailed guidance on different flashing types and where each material performs best. Their research confirms what roofers in coastal areas already know: material selection should match both the environment and the expected service life.
Recognizing When Lead Flashing Needs Attention
Most homeowners never see their roofing lead flashing up close until there's a problem. The challenge is that flashing failures often show up as interior leaks that seem unrelated to the actual failure point.
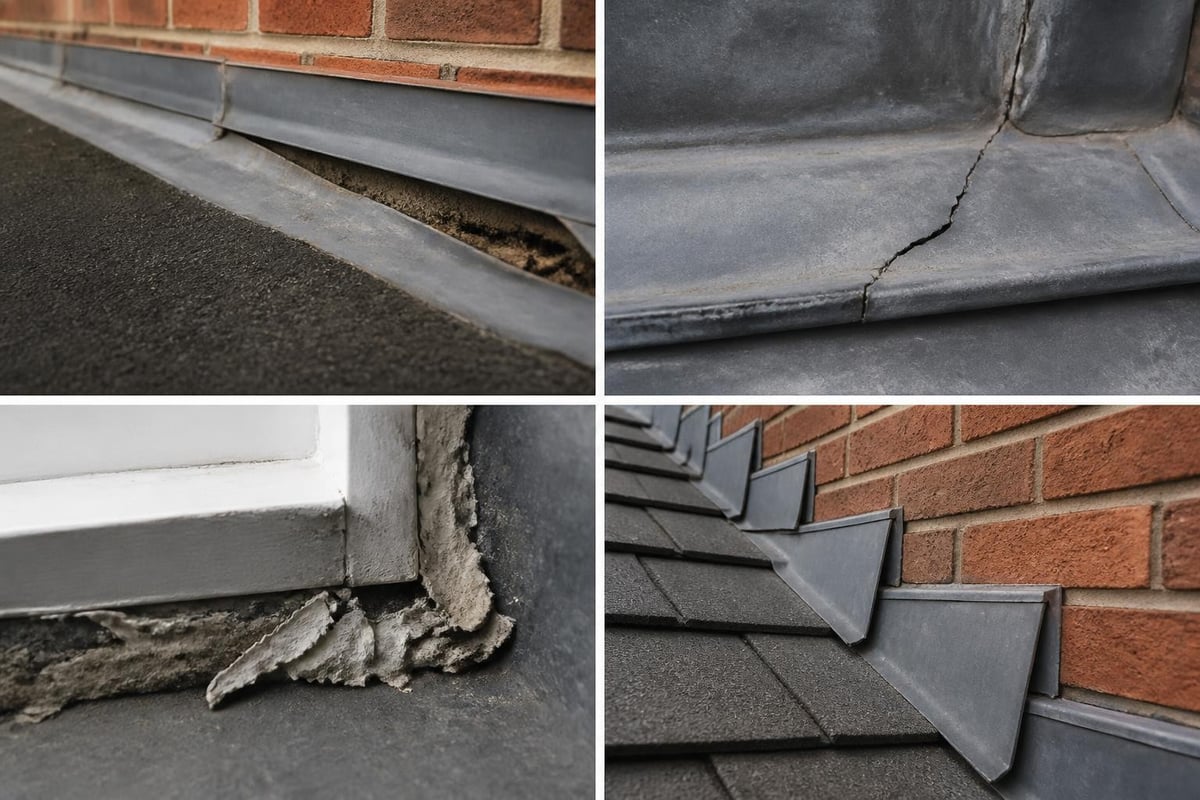
Warning signs of flashing problems:
- Water stains on ceilings near chimneys – Usually indicates deteriorated chimney flashing
- Leaks during wind-driven rain but not regular rain – Suggests gaps in wall flashing
- Drips around pipe penetrations – Points to failed pipe boot or collar flashing
- Rust stains on siding below roof-wall junctions – Often means the step flashing has separated
The tricky part is that water doesn't always travel straight down. It can run along rafters or sheathing for several feet before dripping onto insulation or drywall. You might see a stain in your living room that traces back to flashing failure at a chimney ten feet away.
In Eastern North Carolina, storm damage can compromise even well-installed flashing. High winds lift shingles, and when they settle back down, the seal against the flashing may not reform completely. Hurricane-force winds can actually bend or dislodge flashing entirely, creating immediate leak pathways.
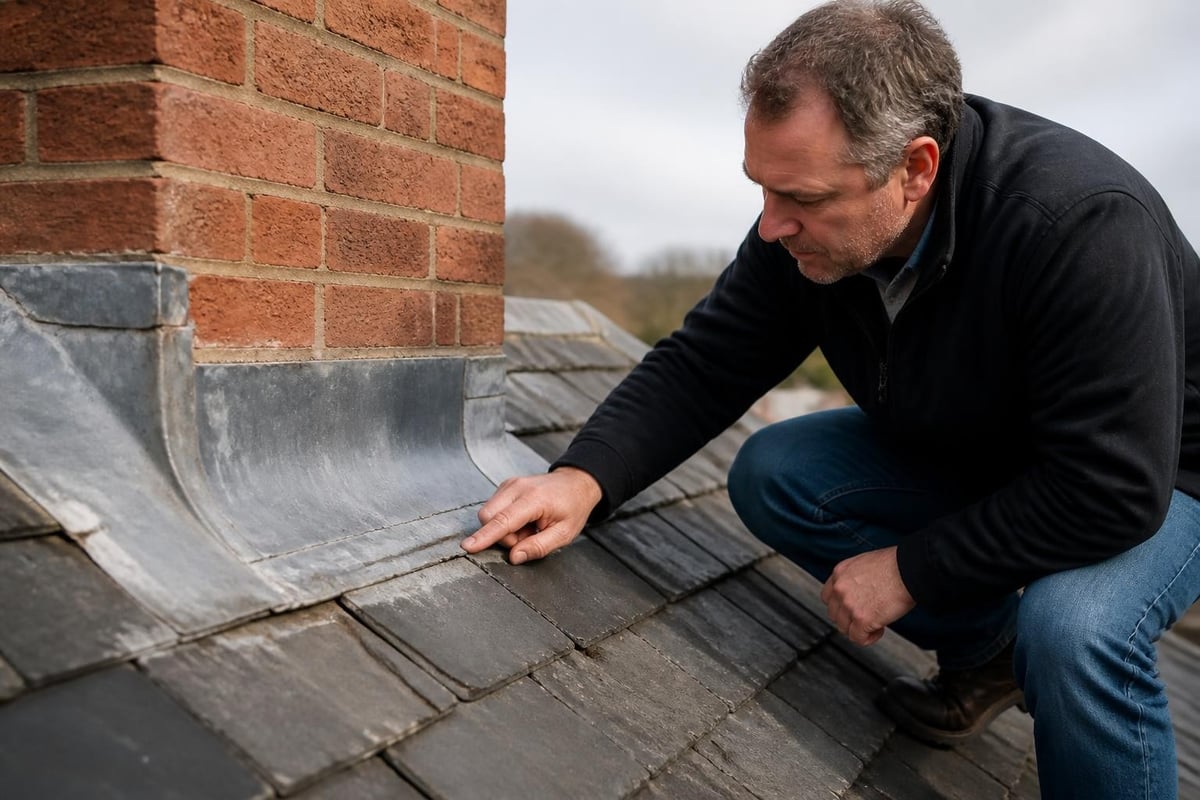
The Inspection Process
Professional flashing inspection requires getting on the roof and examining the details that aren't visible from the ground. This is where roof repair evaluations go beyond just looking at shingles and actually check the waterproofing system as a whole.
A thorough inspection covers:
- Physical condition – Cracks, holes, corrosion, or deterioration
- Seal integrity – Whether caulking or mortar remains intact
- Proper overlap – Each piece should layer correctly to shed water
- Counter flashing – The protective cap piece that covers the base flashing
- Fastener condition – Nails or clips holding everything in place
Lead flashing specifically gets checked for fatigue cracks where it's been bent or formed. Over decades, repeated expansion and contraction can work-harden the metal until it cracks. These hairline fractures are hard to spot but let water seep through.
Installation Standards and Common Mistakes
Proper roofing lead flashing installation follows specific techniques that have proven effective over generations of roofing work. The details matter because shortcuts create the exact leak pathways the flashing is meant to prevent.
Step Flashing at Walls
When a roof meets a vertical wall, step flashing creates a shingled barrier that moves with both surfaces. Each L-shaped piece of lead slips under a shingle course and against the wall, overlapping the piece below it.
Correct step flashing requires:
- Individual pieces, not one continuous strip
- Minimum 4-inch overlap between pieces
- Proper height up the wall (usually 4-5 inches)
- Integration with wall water barrier
- Counter flashing embedded in wall or under siding
The common mistake is using one long piece of flashing instead of individual steps. This seems simpler but creates a rigid connection between wall and roof. When the structure moves even slightly, that solid piece cracks or pulls loose. Individual steps flex independently and maintain their seal.
IKO's installation guide demonstrates why the shingling principle applies to flashing just as it does to roof shingles themselves. Water always needs a path downward that doesn't involve flowing under any material.
Chimney Flashing Systems
Chimneys require the most complex flashing installations because they interrupt the roof plane on all sides and need protection from both water and heat.
A complete chimney flashing system includes:
- Base flashing – Forms the foundation seal between chimney and roof
- Step flashing – Layers up the chimney sides with each shingle course
- Counter flashing – Embedded in chimney mortar joints, covers the step flashing
- Back pan – Diverts water around the chimney's uphill side
- Cricket – A small peaked structure that prevents water and debris accumulation
Many leak calls related to chimneys actually stem from mortar deterioration rather than the lead flashing itself. The counter flashing sits in a groove (called a reglet) cut into the mortar joints, and when that mortar crumbles, the flashing loses its anchor. Water then runs behind the counter flashing and under the base flashing.
Pipe Penetration Details
Soil stacks and other pipe penetrations need specialized flashing that seals around a circular opening. Traditional installations used lead sheets formed into a cone shape with a hole for the pipe.
Modern pipe flashing typically involves:
- Lead or EPDM rubber base with an integrated collar
- Proper slope matching to roof pitch
- Sealed connection to pipe exterior
- Shingle integration on the upslope side
- Exposed flashing on downslope to shed water
The installation at New England Metal Roof shows the careful detailing needed for pipe flashings to last decades without leaking. The key is creating a watertight bond where the flashing transitions from flat roof surface to vertical pipe, all while maintaining flexibility for thermal movement.
Repair vs. Replacement Decisions
Not every flashing issue requires complete replacement. Sometimes a targeted repair extends the life of existing flashing for years at a fraction of replacement cost.
| Issue | Repair Option | Replacement Indicator |
|---|---|---|
| Small crack in counter flashing | High-quality sealant | Multiple cracks or extensive damage |
| Lifted corner of step flashing | Re-secure and seal | Corroded metal or missing pieces |
| Deteriorated pipe boot seal | New boot over existing base | Base flashing cracked or rotted |
| Separated chimney counter flashing | Re-embed in fresh mortar | Base flashing damaged or wrong type |
| Minor caulk failure | Remove old caulk, apply fresh | Flashing movement or structural issues |
The honest answer from a roofing perspective is that repairs work when the underlying flashing remains sound. If the lead itself has deteriorated, cracked extensively, or was installed incorrectly from the start, repairs just delay an inevitable full replacement.
Coastal environments accelerate this decision timeline. Salt spray and humidity push everything toward the replacement side of the equation faster than in drier climates. A repair that might last five years inland might only give you two years near the coast.
Cost Considerations
Roofing lead flashing replacement costs vary significantly based on complexity and access. A simple pipe boot replacement might run $150-300 per penetration. Full chimney flashing replacement typically ranges from $800-1,500 depending on chimney size and roof pitch.
Factors affecting flashing repair costs:
- Roof pitch and accessibility
- Number and type of penetrations
- Material choice (lead vs. alternatives)
- Whether surrounding shingles need replacement
- Chimney condition and necessary masonry work
For homeowners making budget decisions, it helps to understand that flashing work often gets bundled with roof replacement. If your roof needs replacement within the next few years, temporary flashing repairs might make sense. If the roof has another decade of life, investing in quality flashing replacement protects that investment.
Maintenance and Inspection Schedules
Unlike shingles that you can spot-check from the ground, roofing lead flashing needs periodic hands-on inspection to catch problems before they become leaks.
A reasonable maintenance schedule includes:
- Annual visual inspection – Check from ground level for obvious issues
- Professional inspection every 3-5 years – Includes roof access and close examination
- Post-storm assessment – After hurricanes or severe weather events
- Pre-sale inspection – Before listing your home for sale
During these inspections, specific attention goes to the sealant and caulk that supplements the mechanical flashing installation. Even quality polyurethane caulk only lasts 10-15 years before it needs replacement. This maintenance item prevents minor seal failures from becoming major leak sources.
For coastal homeowners, paying attention after storm events makes particular sense. The Atlas Roofing guide emphasizes that flashing at roof-to-wall interfaces takes the brunt of wind-driven rain. After a storm with sustained winds above 40 mph, a basic inspection helps catch new problems while they're still simple fixes.
Understanding Installation Codes and Standards
Roofing lead flashing installation isn't just about proven techniques. Building codes specify minimum requirements to ensure installations meet basic performance standards.
Key code requirements typically include:
- Minimum flashing width and overlap dimensions
- Corrosion-resistant fasteners in coastal zones
- Proper integration with weather-resistant barriers
- Cricket requirements for chimneys above certain widths
- Ice dam protection in applicable regions
North Carolina building codes adopt the International Residential Code (IRC) with state-specific amendments. For flashing specifically, the code requires that "flashings shall be installed in such a manner as to prevent moisture from entering the wall and roof through joints."
That simple statement covers extensive detail work. Trill Roofing's comprehensive explanation of various flashing types shows how each installation method follows this principle while adapting to different roof features and penetrations.
In coastal high-wind zones, additional fastening requirements apply. Flashing needs to withstand the same wind loads as the roofing system itself, which means more secure attachment methods than might be used inland.
Working with Professionals
Installing roofing lead flashing correctly requires specific skills that go beyond general roofing knowledge. The material handling alone presents a learning curve. Lead is heavy, soft, and requires shaping techniques that take practice to master.
When hiring for flashing work, look for:
- Experience specifically with lead flashing installations
- Understanding of coastal weather challenges
- Willingness to explain the work and show you problem areas
- Proper licensing and insurance
- References from similar flashing projects
The step-by-step installation guide demonstrates why this work demands precision. Each fold, overlap, and fastener placement affects long-term performance. Shortcuts during installation create the exact vulnerabilities the flashing is meant to eliminate.
Material Sourcing and Quality Variations
Not all lead flashing comes from the same source or meets the same quality standards. The material itself varies in thickness, purity, and manufacturing quality.
Lead flashing typically comes in these standard weights:
- Code 3: 1.32 mm thick, 14.97 kg/m² – Light applications
- Code 4: 1.80 mm thick, 20.41 kg/m² – Standard roofing use
- Code 5: 2.24 mm thick, 25.40 kg/m² – Heavy-duty applications
- Code 6: 2.65 mm thick, 30.05 kg/m² – Extreme exposure areas
For coastal North Carolina installations, Code 4 represents the minimum for most applications, with Code 5 preferred for chimney flashings and highly exposed locations. The heavier material resists wind uplift better and lasts longer in salt air environments.
Quality also depends on lead purity. Roofing lead should be at least 99.9% pure. Lower purity materials contain harder metals that make the lead less workable and more prone to cracking when formed.
Alternative Materials and When They Make Sense
While this article focuses on roofing lead flashing, understanding alternatives helps homeowners make informed material choices based on their specific situation and budget.
When alternatives might be preferred:
- Aluminum – When budget is tight and roof lifespan is limited
- Copper – For high-end homes where appearance matters and budget allows
- Galvanized steel – For non-coastal locations with drier climates
- EPDM rubber – For simple pipe boot replacements on newer roofs
- Composite materials – For specific manufacturer system requirements
Each material brings trade-offs between cost, longevity, and installation requirements. Lead's combination of durability, workability, and coastal performance keeps it relevant despite higher material costs and specialized installation needs.
The decision ultimately comes down to matching the flashing to the roof's expected service life. Installing 75-year lead flashing on a roof with 10 years left doesn't make financial sense. Conversely, using 20-year aluminum flashing on a new 50-year roof creates a known future failure point.
Roofing lead flashing protects your home at critical transition points where water naturally wants to find a way inside. Understanding what it does, when it needs attention, and how to maintain it helps you make smart decisions about repairs before small issues become expensive problems. If you're dealing with leaks around chimneys, walls, or roof penetrations in the Hampstead, Wilmington, or surrounding coastal areas, NC Roofs provides honest assessments and clear recommendations about what actually needs fixing. We'll help you understand your options and find the solution that makes sense for your home and budget.

