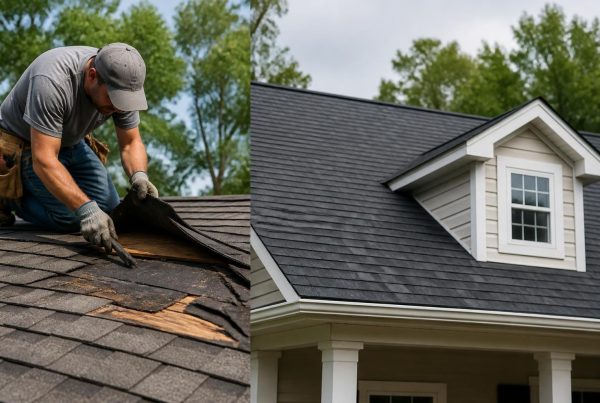
When wind comes through Eastern North Carolina, it often leaves evidence behind. Lifted shingles, missing pieces, exposed underlayment. Homeowners know something happened, but they are not always sure what kind of damage they are dealing with or what comes next. Understanding wind damage roof inspection what to expect gives you clarity about the process, the timeline, and what findings actually mean. You will know what happens before the inspector arrives, what they check during the visit, and how to use that information to make your next decision.
What Happens Before the Inspector Arrives
The inspection begins the moment you schedule it. Most roofers ask a few basic questions: when did the wind event occur, have you noticed specific issues like missing shingles or leaks, and are you planning to file an insurance claim. These details help the inspector prepare and bring the right tools.
You do not need to clean your roof or move anything. The inspector handles roof access safely. Your role is to provide any background information, like past repairs or known problem areas. If you have photos from before the storm, those can be helpful for comparison.
Scheduling Around Weather and Timing
Inspections should happen as soon as safely possible after a wind event. Waiting weeks or months can allow minor damage to worsen, especially in coastal climates where rain follows quickly. Most roofing companies in Hampstead, Surf City, and Wilmington schedule inspections within a few days of your call, weather permitting.
Rain delays are common. Wet roofs are unsafe to walk on, and moisture hides certain types of damage. Inspectors typically reschedule if conditions are not right. You will not be charged for weather delays.
The Ground-Level Walkthrough
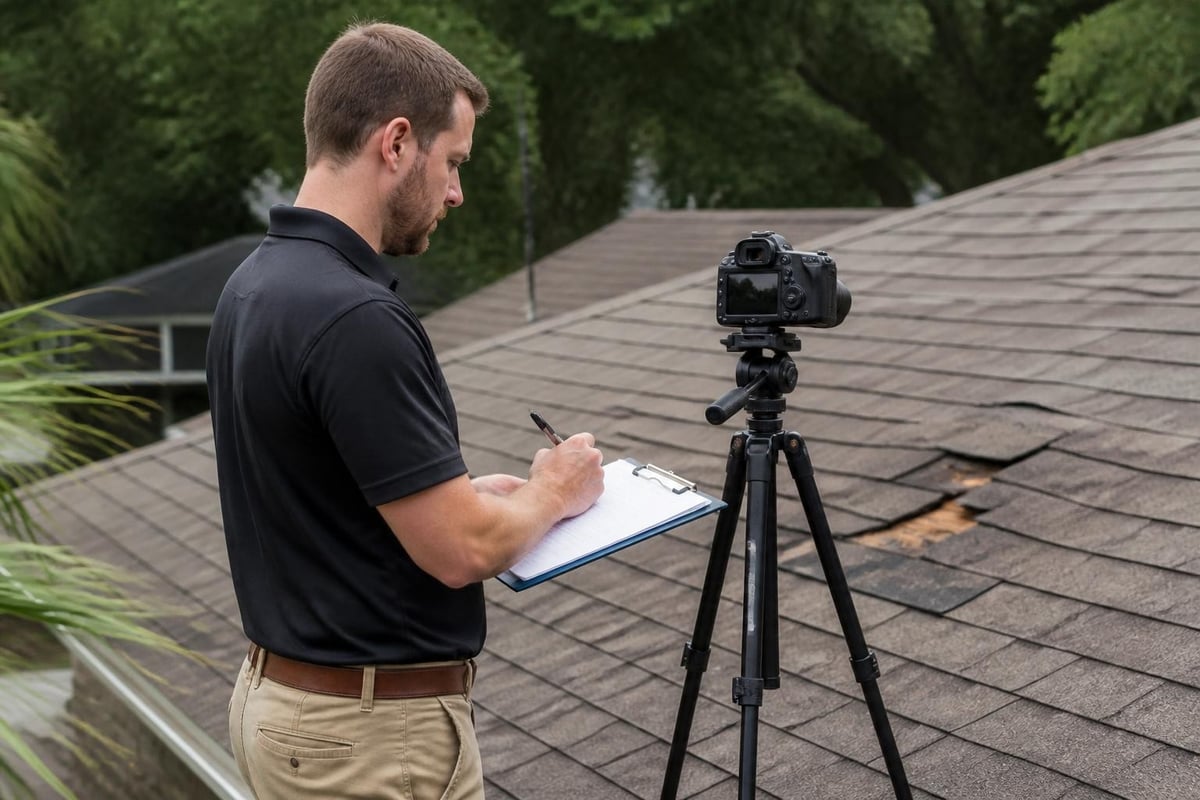
Most inspections start on the ground. The inspector walks your property looking for debris, scattered shingle granules, and pieces of roofing material in gutters or landscaping. This step reveals a lot before anyone climbs a ladder.
Ground-level indicators of wind damage include:
- Shingle tabs or pieces in the yard
- Granule loss visible in gutter downspouts
- Lifted edges you can see from below
- Displaced flashing around chimneys or vents
- Debris impact marks on siding or gutters
The inspector also checks your gutters, soffits, and fascia. Wind often damages these areas first, and they provide clues about how hard the wind hit and from which direction. Understanding post-storm roof damage assessment techniques helps you recognize what the inspector is noting.
Why the Ground View Matters
Some damage is easier to spot from below. Curled shingles, missing ridge caps, and separated flashing stand out when viewed at an angle. The inspector documents these findings with photos before moving to the roof itself.
This stage takes 10 to 15 minutes depending on property size. You can follow along or wait inside. Either way, the inspector explains what they found before moving to the next step.
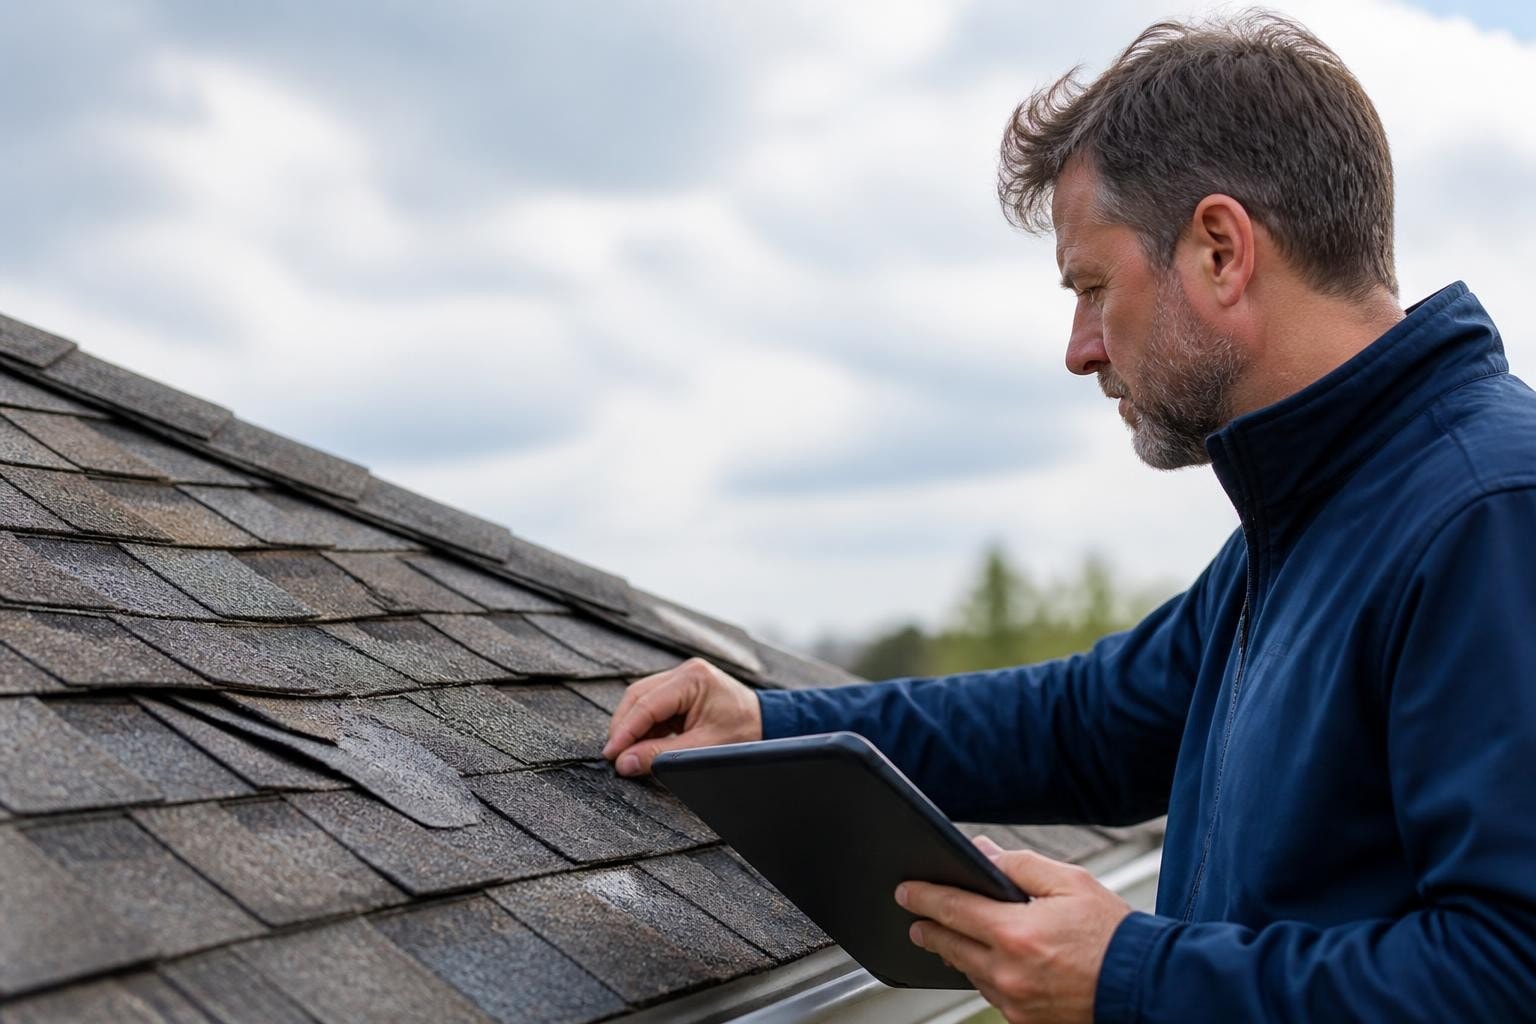
What the Roof-Level Inspection Covers
Once on the roof, the inspector examines every section methodically. They are looking for both obvious damage and subtle signs that might not cause problems today but will in six months. Wind damage roof inspection what to expect at this stage includes a detailed review of shingles, underlayment exposure, fastener integrity, and structural components.
The inspection follows a pattern, typically starting at the ridge and working down in sections. Inspectors check:
| Inspection Area | What They Look For | Why It Matters |
|---|---|---|
| Shingle surface | Creasing, bruising, lifted tabs, missing pieces | Indicates wind speed and duration |
| Fasteners | Exposed nails, pulled nails, seal failure | Shows whether shingles will stay attached |
| Flashing | Separation, bends, gaps around penetrations | Prevents future leaks at vulnerable points |
| Underlayment | Tears, exposure, moisture intrusion | Protects roof deck when shingles fail |
| Roof deck | Soft spots, sagging, visible damage from below | Structural integrity affects repair scope |
Each zone gets photographed from multiple angles. Inspectors use markers or measurements to document exact locations. This level of detail matters for insurance claims and repair planning.
How Long the Roof Inspection Takes
Expect 30 to 45 minutes for an average single-family home. Larger roofs, steep pitches, or heavy damage extend that time. The inspector may climb down, review notes, then go back up to double-check specific areas. This is normal.
You do not need to be present on the roof. Most homeowners wait at ground level. If you want to see damage firsthand, some inspectors offer photos or video taken during the assessment.
Understanding What Gets Documented
Documentation separates a useful inspection from a basic visual check. A thorough wind damage roof inspection what to expect includes written notes, labeled photos, measurements, and a condition assessment for each roof section. This information becomes the basis for repair estimates and insurance claims.
Standard documentation includes:
- Photo record: Wide shots showing overall condition, close-ups of specific damage, reference images with measurements
- Damage map: Diagram marking where issues exist, severity ratings, and material affected
- Material assessment: Age and condition of shingles, remaining lifespan estimates, pre-existing wear vs. storm damage
- Measurement data: Square footage affected, replacement material quantities, scope of work needed
Some inspectors use apps or tablets to generate reports on-site. Others compile findings later and send a detailed PDF within 24 to 48 hours. Ask upfront about report timing if you need documentation quickly for insurance purposes.
The Difference Between Inspection and Estimate
An inspection identifies damage. An estimate prices the repair. You might receive both in one visit, or the estimate may come after you review the inspection findings. For roof repair decisions, seeing the inspection first helps you understand whether the work makes sense before committing to anything.
Not every inspection leads to a recommendation for immediate work. Sometimes the damage is minor enough to monitor, or repairs can wait until a planned replacement in a year or two. A good inspector explains your options without pushing toward the most expensive solution.
How Inspectors Identify Wind vs. Other Damage
Wind damage looks different than hail impact, aging, or installation defects. Inspectors know the patterns. Wind-induced roofing failures follow predictable mechanics based on roof design, material type, and exposure.
Common Wind Damage Patterns
Wind lifts shingles from their bottom edge, often in rows or sections facing the prevailing wind direction. You will see:
- Tab edges curled upward or creased
- Missing shingles in stair-step patterns
- Damage concentrated on roof corners, ridges, and edges
- Underlayment tears aligned with wind direction
Hail leaves round bruises or cracks. Aging shows up as widespread granule loss, brittleness, and uniform wear. Installation problems appear as crooked lines, improper nail placement, or lifting near seams. The inspector notes these differences because insurance coverage varies by cause.
Why Cause Matters for Your Next Steps
Insurance typically covers sudden wind events but not gradual aging. If your roof has both storm damage and old-age wear, the inspector separates the two in their report. This clarity helps you understand what to claim and what falls under normal maintenance. Resources like this roof inspection checklist outline the distinctions adjusters look for.
Interior and Attic Inspection Components
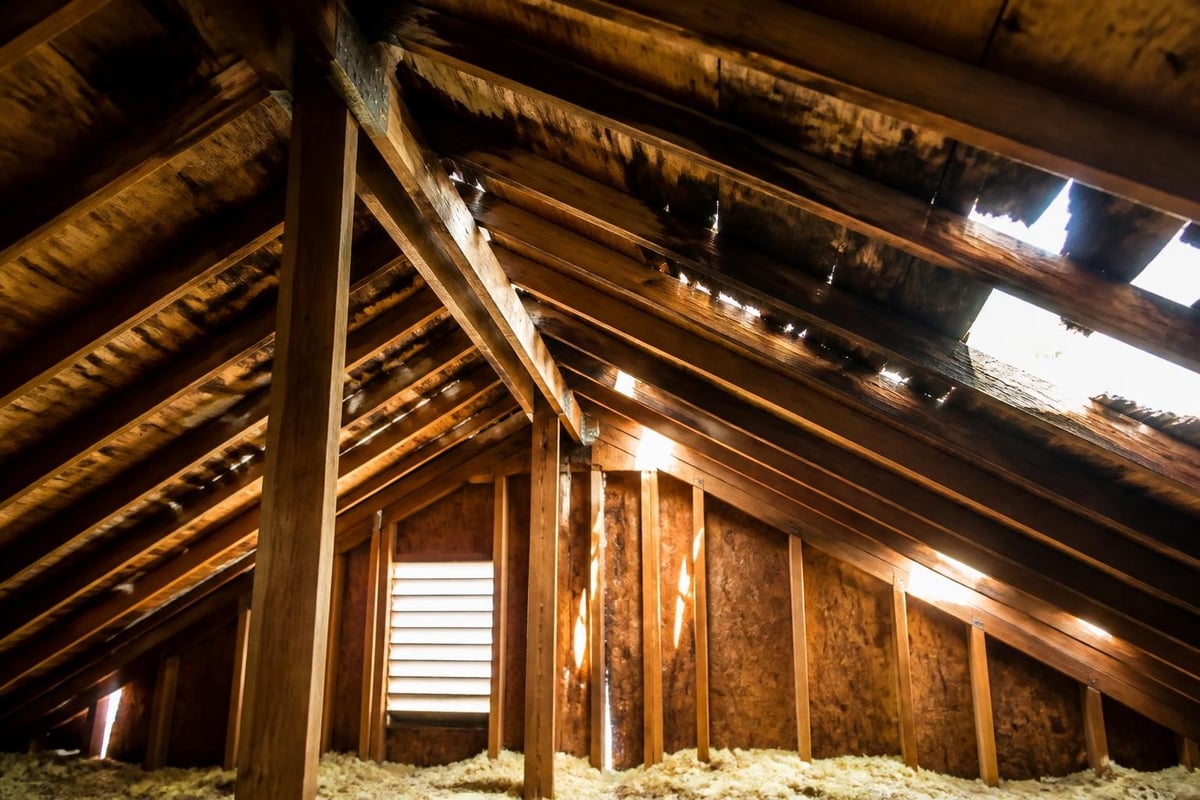
A complete wind damage inspection does not stop at the roof surface. Inspectors check your attic and interior ceilings for evidence of moisture intrusion, ventilation problems, and structural issues caused by wind stress.
From inside the attic, you can see:
- Light coming through the roof deck
- Water stains on rafters or sheathing
- Displaced insulation from air movement
- Roof deck movement or separation
Ceiling stains or sagging drywall in living spaces indicate active leaks. Even if shingles look intact from outside, wind can compromise seals and allow water penetration. Inspectors use flashlights and moisture meters to catch problems before they spread.
Ventilation and Wind Pressure
Wind does not just damage shingles. It creates pressure differentials that can blow off ridge vents, soffit panels, or gable vents. Poor ventilation makes this worse by allowing pressure to build inside the attic. The inspector evaluates whether your ventilation system contributed to damage and whether it needs upgrading during repairs.
What the Inspection Report Includes
You will receive a written report summarizing findings. Format and detail vary, but expect these sections:
| Report Section | Content | Purpose |
|---|---|---|
| Property details | Address, roof type, age, square footage | Context for findings |
| Damage summary | List of issues by severity and location | Overview of scope |
| Photo documentation | Labeled images with descriptions | Visual evidence |
| Recommendations | Repair vs. replace guidance, priority items | Decision support |
| Cost estimate | Labor, materials, timeline (if requested) | Budget planning |
Reports for insurance claims include additional detail, such as code references, material specifications, and separation of storm damage from prior conditions. Some inspectors provide a simplified homeowner version and a detailed adjuster version.
How to Read Your Inspection Report
Look for clear language about what needs immediate attention versus what can wait. A good report explains why each item matters and what happens if you delay. It should not feel like a sales document. You are getting information to make your own decision.
If something is unclear, ask. Roofing terminology can be confusing. Inspectors should be able to explain findings in plain terms without jargon.
Working With Insurance After Your Inspection
If you plan to file a claim, your inspection report becomes a key piece of documentation. Insurance adjusters conduct their own assessments, but having a detailed third-party report strengthens your position, especially when damage is subtle or disputed.
Steps for using your inspection with insurance:
- Contact your insurance company and open a claim
- Provide your inspection report and photos
- Schedule the adjuster's visit
- Have your inspector available for questions if needed
- Compare the adjuster's findings to your inspection
- Address discrepancies with documentation
Adjusters sometimes miss damage or attribute it to wear instead of wind. Your inspection report provides a reference point for discussions. Most roofing companies in Eastern North Carolina work with insurance regularly and can help navigate the process. Learning about storm damage roof inspection essentials gives you a foundation for these conversations.
Timeline for Insurance Inspections
Plan for the adjuster to visit within a week or two of your claim. Processing can take additional weeks depending on claim volume after major storms. Wind events that affect entire communities create backlogs. Starting with your own inspection means you know what damage exists while waiting for the insurance process to move forward.
Costs and What You Pay Upfront
Many roofing companies offer free wind damage inspections, especially if you are considering them for the repair work. Some charge a fee that applies toward your repair if you move forward. Ask about costs when scheduling.
Inspection fees typically range from free to $200 depending on roof size and complexity. Insurance claim inspections are often free because the company expects to bid on the repair. Independent inspections for your own records may carry a flat fee.
When Paying for an Inspection Makes Sense
If you want an unbiased assessment with no sales angle, paying for an independent inspection gives you that. You receive findings and recommendations without any expectation to hire that inspector for repairs. This approach works well if you are gathering multiple opinions or navigating a disputed insurance claim.
What Happens After You Receive Your Report
Once you have inspection findings, you control the next steps. You can:
- File an insurance claim if damage qualifies
- Get repair estimates from multiple contractors
- Monitor minor damage and re-inspect after the next storm season
- Schedule repairs immediately if leaks or structural issues exist
- Plan a full replacement if damage is extensive
There is no universal timeline. Some repairs need to happen within days to prevent water damage. Others can wait months if they are cosmetic or low-risk. Understanding wind damage roof inspection what to expect means recognizing that the inspection is the starting point, not the finish line. Additional guidance on identifying wind-damaged roofs can clarify your options.
Monitoring vs. Immediate Repair
Eastern North Carolina's climate does not give roofs much margin. Salt air, humidity, and frequent storms mean small problems grow fast. If your inspection shows compromised seals, exposed underlayment, or missing shingles, waiting usually costs more in the long run. Your inspector should be clear about what tolerates delay and what does not.
Preparing Your Home for the Inspection
You do not need extensive preparation, but a few steps make the process smoother:
- Clear roof access: Move vehicles, patio furniture, or equipment blocking ladder placement
- Secure pets: Keep dogs inside or away from work areas
- Provide access: Unlock gates, disable alarms if the inspector needs attic entry
- Gather documentation: Have photos, prior inspection reports, or repair records available
- Note specific concerns: Write down issues you have noticed so you remember to mention them
The inspector handles the rest. They bring ladders, safety equipment, cameras, and tools. Your role is minimal once the appointment starts.
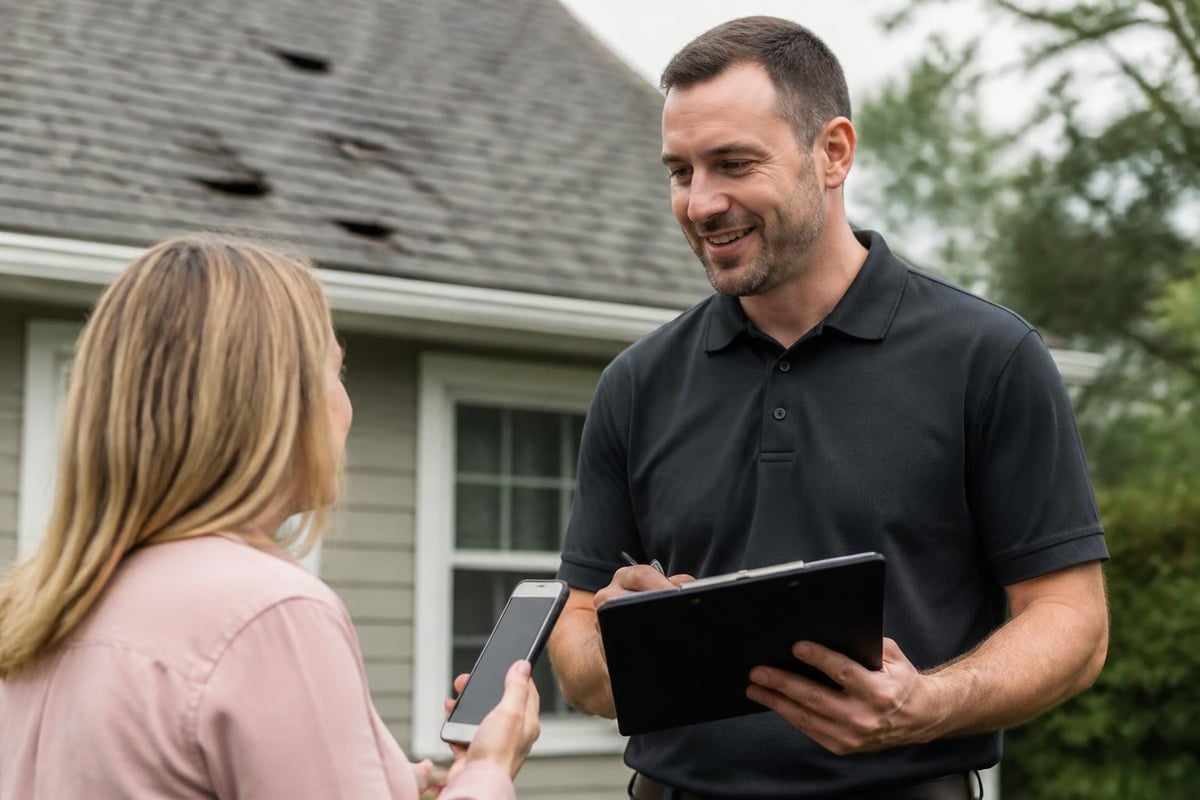
What to Ask During the Inspection
Take the opportunity to learn about your roof. Good questions include:
- How severe is the damage compared to other homes you have inspected recently?
- What is the expected lifespan of my current roof given its condition?
- Are there underlying issues beyond the visible wind damage?
- What happens if I delay repairs for a few months?
- Do you see installation problems or just storm damage?
Inspectors appreciate informed homeowners. Asking questions shows you are engaged and want to understand what is happening, not just get a price. Resources like post-storm inspection steps offer additional context for what to look for.
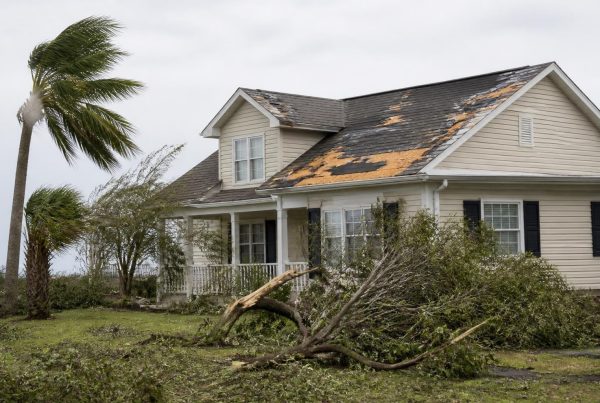
Regional Considerations for Eastern North Carolina
Coastal wind patterns create specific damage types. Salt spray weakens fasteners faster than inland environments. Hurricane-force winds hit differently than straight-line storms. Your inspector should understand these regional factors and how they affect your roof.
Homes near Topsail Beach, Surf City, and Wilmington face consistent salt exposure and high humidity. These conditions mean wind damage often combines with corrosion, requiring more comprehensive repairs than similar damage in drier climates. Local inspectors recognize these patterns and factor them into their assessments.
Building Codes and Wind Ratings
North Carolina building codes require wind-rated shingles in coastal counties. If your roof was installed before current code updates, it may be more vulnerable to wind damage. Inspectors check whether your roof meets modern standards and whether repairs should include upgrades to improve wind resistance.
Understanding wind damage characteristics helps you evaluate whether your roof's performance matches its rating. Older roofs or budget installations may not hold up as well during sustained wind events.
Common Findings and What They Mean
Most wind inspections turn up at least some damage after significant storms. Here is what common findings actually indicate:
- Lifted shingle tabs: Repairable if caught early, but may indicate widespread seal failure
- Missing shingles: Immediate repair needed to prevent water intrusion
- Damaged flashing: Often requires partial replacement, not just re-securing
- Granule loss: May be wind-related or age-related; inspector notes the difference
- Soft roof deck: Indicates water damage; requires deck replacement before new shingles
Not all findings require emergency action. Your report should prioritize issues by urgency and risk. This helps you decide what to address first if budget is a concern.
When Repair is Not Enough
Sometimes wind damage exposes bigger problems. If your roof was already near the end of its lifespan, extensive repairs might not make financial sense. A good inspection report addresses this honestly. You might spend $3,000 on repairs for a roof that needs $8,000 in replacement within two years. Knowing that upfront changes your planning. For more context, review what homeowners should do after a wind storm.
Wind damage roof inspection what to expect comes down to a clear process, honest documentation, and useful information you can act on. You will know what happened to your roof, what it means for your home, and what makes sense as a next step based on condition and cost. If you are in Hampstead, Topsail, Surf City, or anywhere along the coast and need a straightforward wind damage assessment, NC Roofs provides inspection and repair guidance with no pressure and clear answers to help you decide what is right for your home.